
The XDM Schema
14 Aug 2022 » Platform
I had written this post a few months ago, but I realized that there were many topics that I needed to explain before I could finalize it. Now that you understand what the Experience Data Model (XDM), the AEP identities and the unified profile are, let’s see how all of these features are used together.
Fragment structure
The first thing that needs to be clear is that an XDM schema declares the structure of a fragment. Those of you who are familiar with SQL databases may expect that each XDM schema defines something equivalent to a table. However, as I explained in the post about the unified profile, there is only one profile made of various fragments. So, when you create an XDM schema, you always have to consider how it fits in the unified profile.
Schema types
Let’s start by creating a new schema.
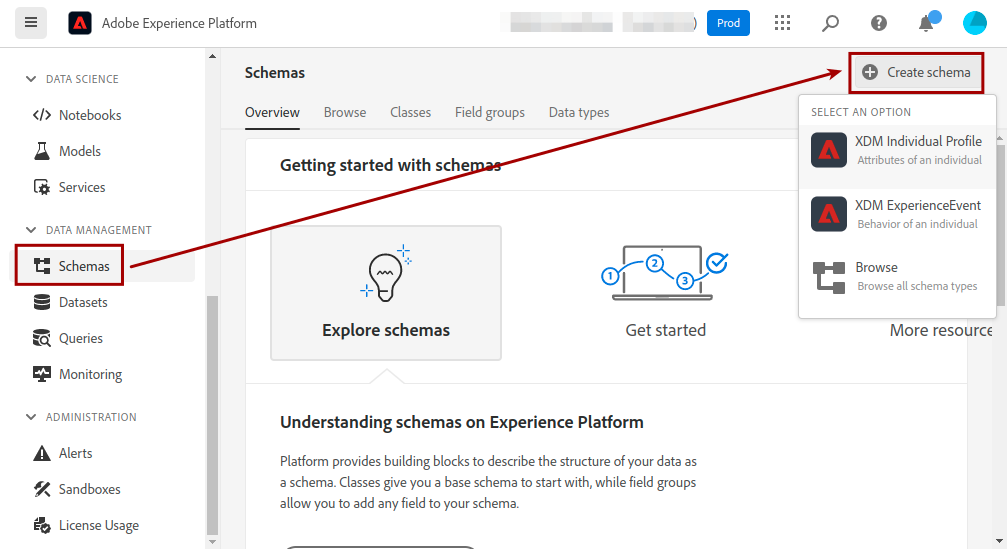
The first thing that you need to choose is the type. There are schemas types:
- XDM Individual Profile. The official definition states: “[it] is a standard Experience Data Model (XDM) class which forms a singular representation (or “profile”) of an individual person”. One way of understanding this type of schema is that it relates to what the profile is. For each attribute, there is only one acceptable value or, in some cases, an array of values. Typical examples of this case are: name, address, phone number, loyalty card number…
- XDM ExperienceEvent. In this case, I found the official definition confusing. These schemas represent events that are associated with a profile. The importance here is that there can be multiple events. In other words, they capture what a profile has done. For example: visits to the website, purchases, calls to the call center…
- Lookup tables. I am using this terminology as the official documentation does not give it a proper name. These schemas store information that has no place in the previous 2 schemas. For example, you may want to store product descriptions, but only have the SKU in an ExperienceEvent. The UI is very confusing here, as this option does not show up in the options when creating a new schema.
In this post, I will ignore lookup tables and I will not go into the details of the “Browse” option.
After selecting XDM Individual Profile or XDM ExperienceEvent, you will get the bare minimum for each schema type:
| Minimum schema for XDM Individual Profile | Minimum schema for XDM ExperieceEvent |
|---|---|
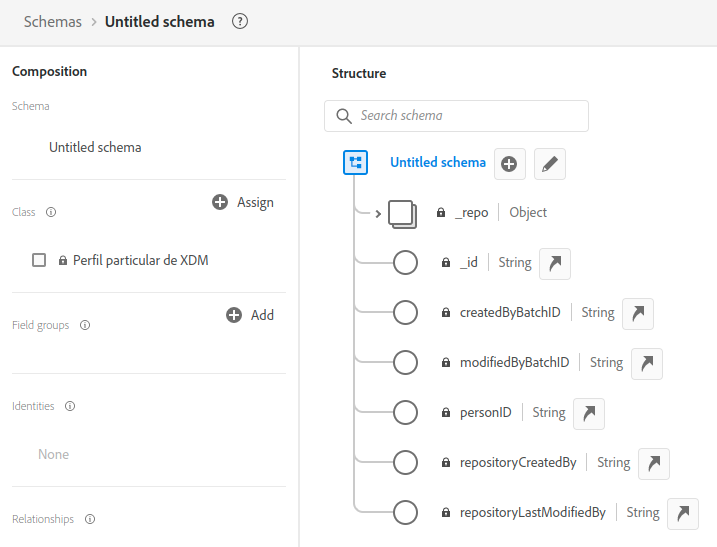 |
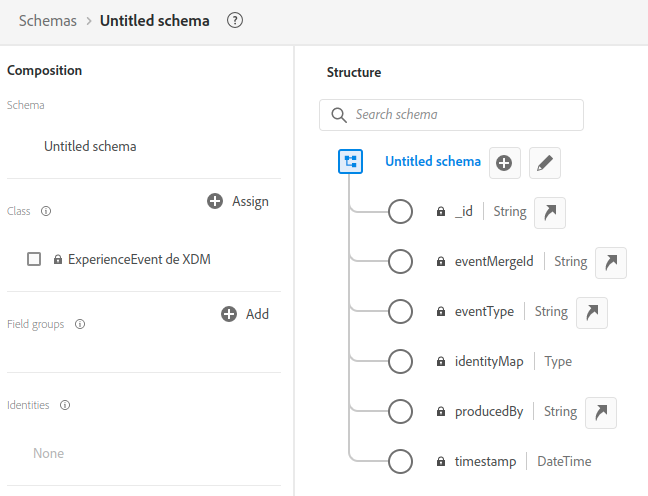 |
Give it a name and a description on the right and save it. Do not enable it for profile now; bad things will happen if you do so. Remember: once it is enabled, there is no going back. I will explain in a future blog how and when to enable this feature.
Field groups
Get back to your newly created schema. Now it is time to populate it. All fields or data attributes that you create must be part of a field group. You can think of a field group as a reusable collection of fields. This is why Adobe has created a multitude of field groups so that you do not have to create them again. Therefore, before you start creating one from scratch, remember to check whether there is an existing field group that has what you need. Click on the “+ Add” button next to “Field groups” and browse the existing field groups:
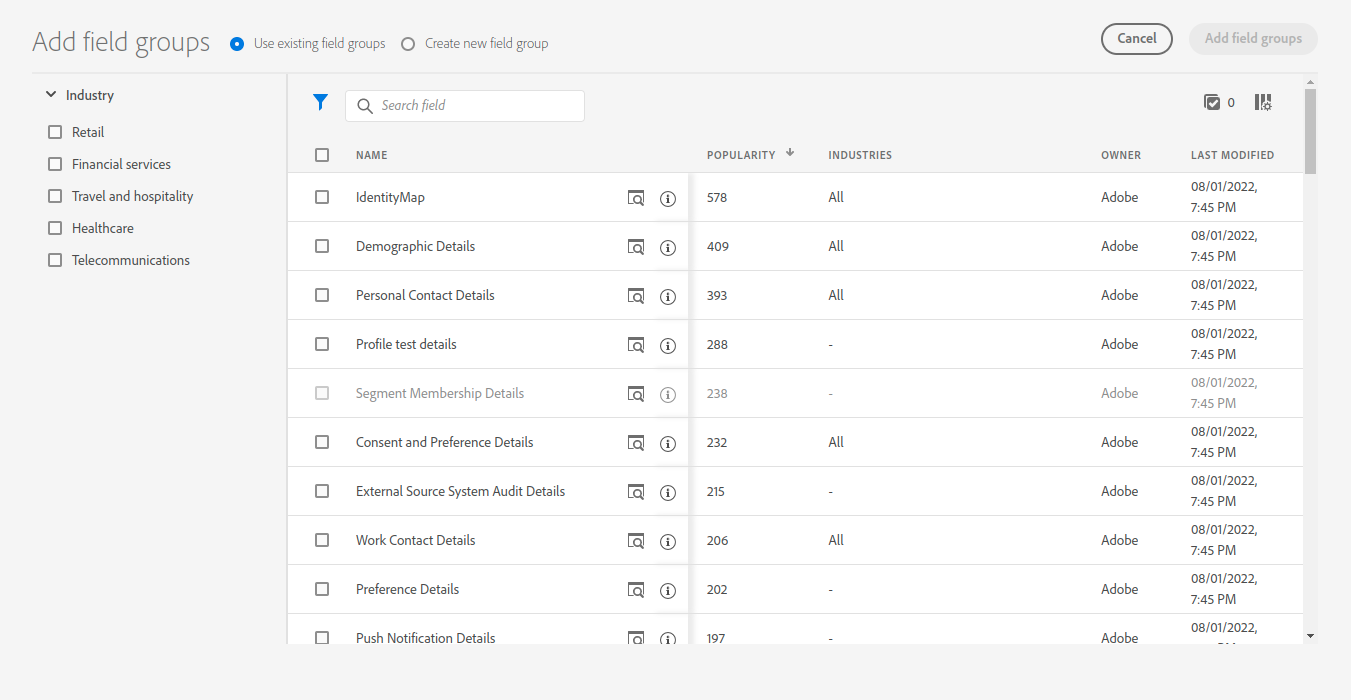
Clicking on the icon will show you the attributes or fields that each field group has. I am pretty sure that most of your requirements are already represented in a field group. You will notice that there is attribute overlap between different field groups. This is OK: remember that the merge policies will select only one value per attribute. In this case, just choose the field group that works best for you.
That being said, it is inevitable that some data attributes are very specific to your business or data source and they will not be part of any existing field group. In this case, you need to create one or many new field groups:
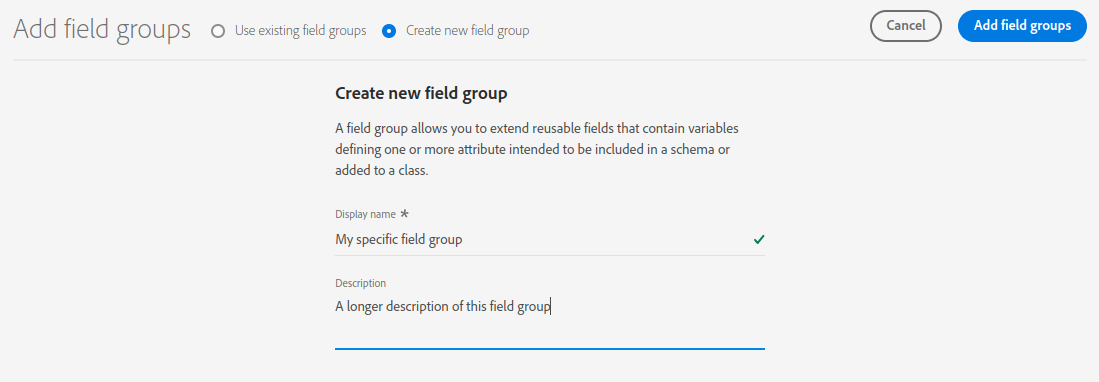
As a final remark, if you have heard the word “mixin”, it is an old name for field group.
Fields
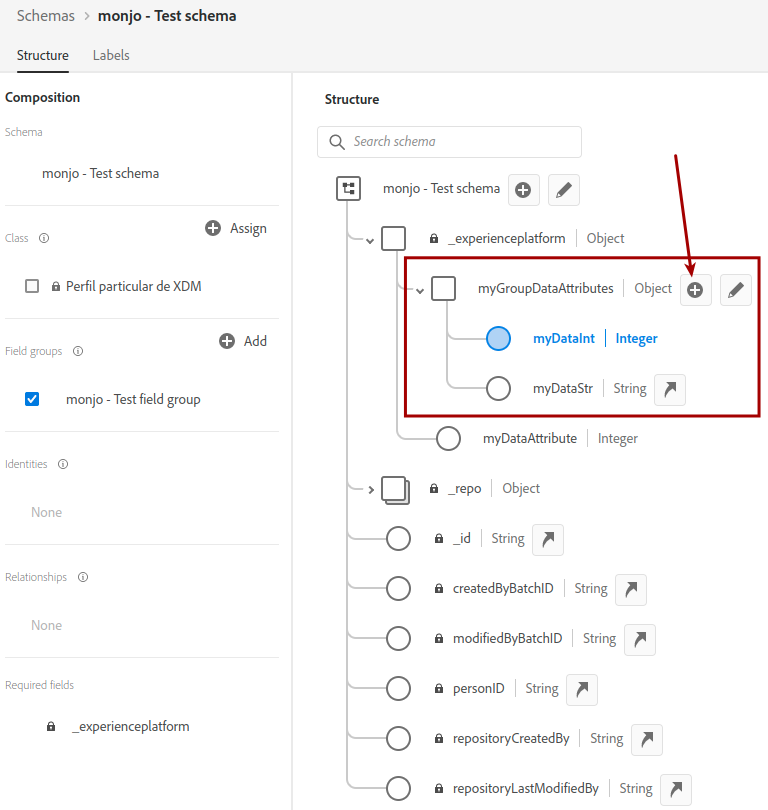
If you have reached this point, it is because some data attributes are not offered by any out-of-the-box field groups. I assume that you have also created one field group for this attribute. Now, click on the “+” button next to your schema name:
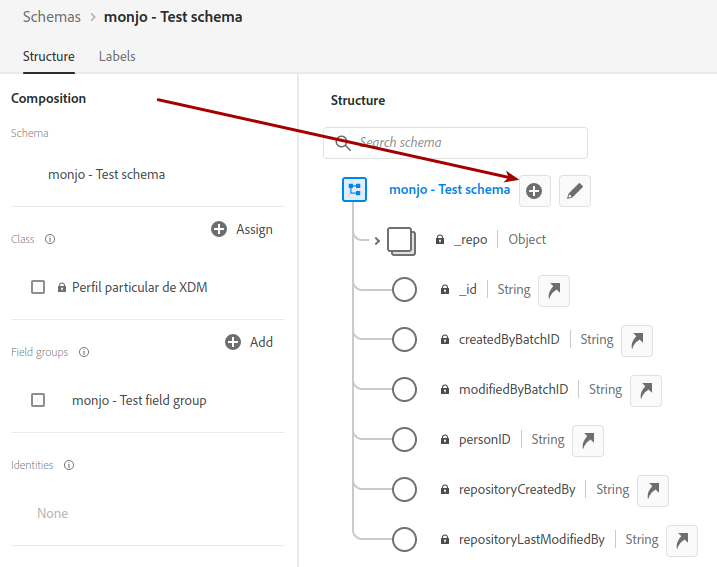
A new data attribute will have been created. Now you have to configure it, on the right:
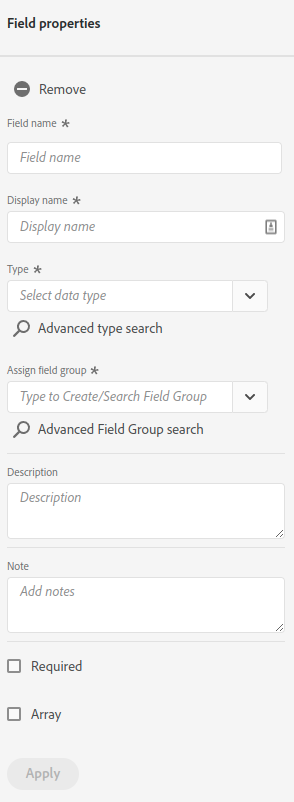
- Field name: use only alphanumeric characters and underscores.
- Display name: although you could put anything here, I see that it is common practice to put the same value as the field name
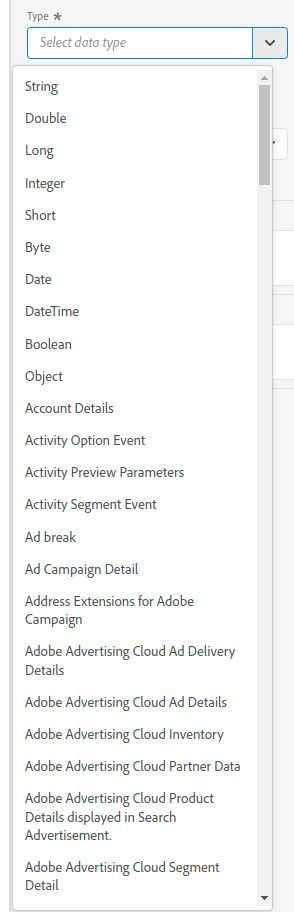
- Type: choose your data type (see below for more information)
- Assign field group: choose one of the field groups that you have created (do not use any of the predefined field groups)
Click “Apply”. Repeat for all data attributes.
You will notice that all custom data attributes are placed under your tenant ID, with an underscore prepended (_experienceplatform in this screenshot, which is an Adobe-internal tenant ID):
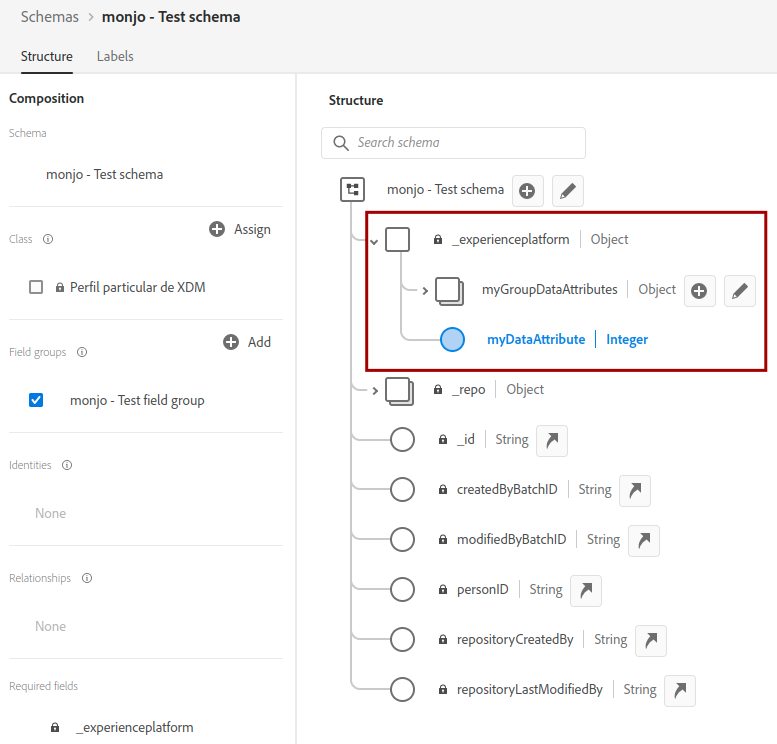
In case you have not noticed it, I am using the concepts of “field”, “data attribute” and “data point” as synonyms in this post.
Data types
AEP supports the following basic data types:
- String. This is a fancy name for text.
- Double. Numbers with decimals.
- Long, Integer, Short, Byte. All of these are integer numbers of different sizes, which translates into different minimum and maximum values. I know, it is confusing that one type is Integer when all are integers.
- Date. Combination of day, month and year.
- DateTime. Combination of day, month, year, hour, minutes and seconds.
- Boolean. Just true or false.
- Arrays. These are lists of the same data attribute.
- Object. Since data can be nested, an object is just a substructure of the previous data types and other objects.
Before continuing, I would like to elaborate a bit more on the object data type. It is generally a good idea to logically group fields in objects. From a technical perspective, there are no differences. However, from a conceptual point of view, it will be easier to identify and understand these attributes if they are grouped. In this case, you should first create an object and click on the “+” button next to this object to add new fields under it:
From the data type dropdown in the UI, you will notice that there are many more data types like Device, Environment or Geo. These are just objects that have been created for you, in case you find them useful:
Finally, you may be wondering how you create an array. Once you have added the field and chosen the data type, at the bottom, you can check the “Array” checkbox. This will convert your data attribute or object into an array.
Identifiers
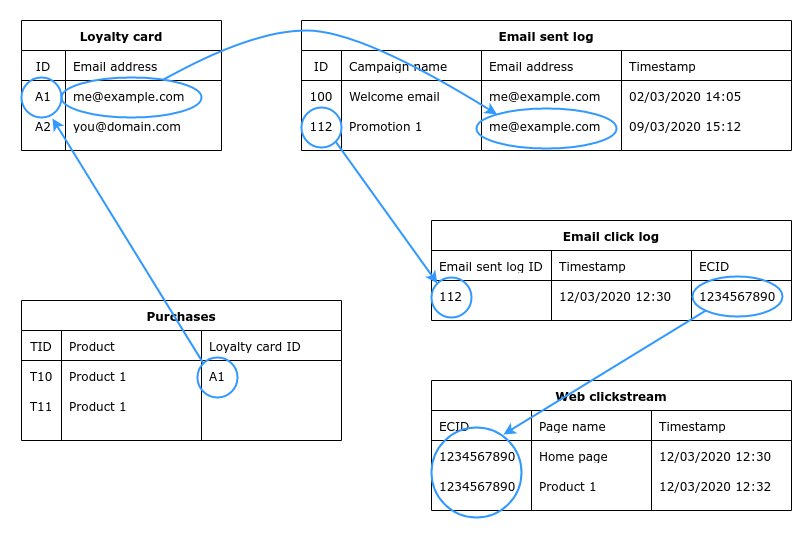
The final piece of this puzzle is selecting the AEP identities. Some of the fields you have configured will be unique identifiers, needed to create the unified profile by creating a graph and merging profile fragments. As a reminder, remember the following diagram from my post Introduction to the Adobe Experience Platform - Part 2 shows it graphically:
For those fields, you need to take the following steps:
- The field must be of type String.
- At the bottom of the configuration panel, select “Identity”.
- From the dropdown, select the associated namespace. You may need to create a new namespace for your business-specific identities.
- If the identity is the primary identity of the fragment (i.e. it will be present in all records), check the corresponding checkbox.
- Click on “Apply”.
This new field will have a special icon and it will be listed as an identity:

Photo by Thirdman