
Authentication with JWT
20 Feb 2022 » MSA
Once you have created an account in Adobe IO, you will want to use it to connect to the API you have configured. I do not know how other vendors work, but in the case of Adobe, before you can connect to the API, you need to authenticate. In this post, I will explain the process for the case of a service account (JWT). It is important to understand that the authentication happens against an endpoint, which is different from the API.
What is JWT
If you have never heard of JWT (as it was my case not that long ago), I recommend you first read this JWT introduction.
JSON Web Token (JWT) is an open standard (RFC 7519) that defines a compact and self-contained way for securely transmitting information between parties as a JSON object. This information can be verified and trusted because it is digitally signed.
As this introduction also explains, JWT is very well suited for authorisation purposes. In case you are wondering, this is what it looks like:

As you can see with the colouring, it has three parts:
- Header (in red)
- Payload (in purple)
- Signature (in blue)
which are encoded individually in Base64Url and concatenated using the dot (.) as the separator.
Inputs for JWT
Now that you know what JWT is for and its shape, let’s see how it works. If you are reading this, you are probably a developer, who has been asked to implement an application that needs to connect to an Adobe API. You probably do not need to implement all details of JWT, as there are dozens of libraries for you to choose from. However, in this tutorial, I will go step by step, to make it clear.
To start with, you need to go back to the Adobe Developer Console and choose the project you have created for this purpose.
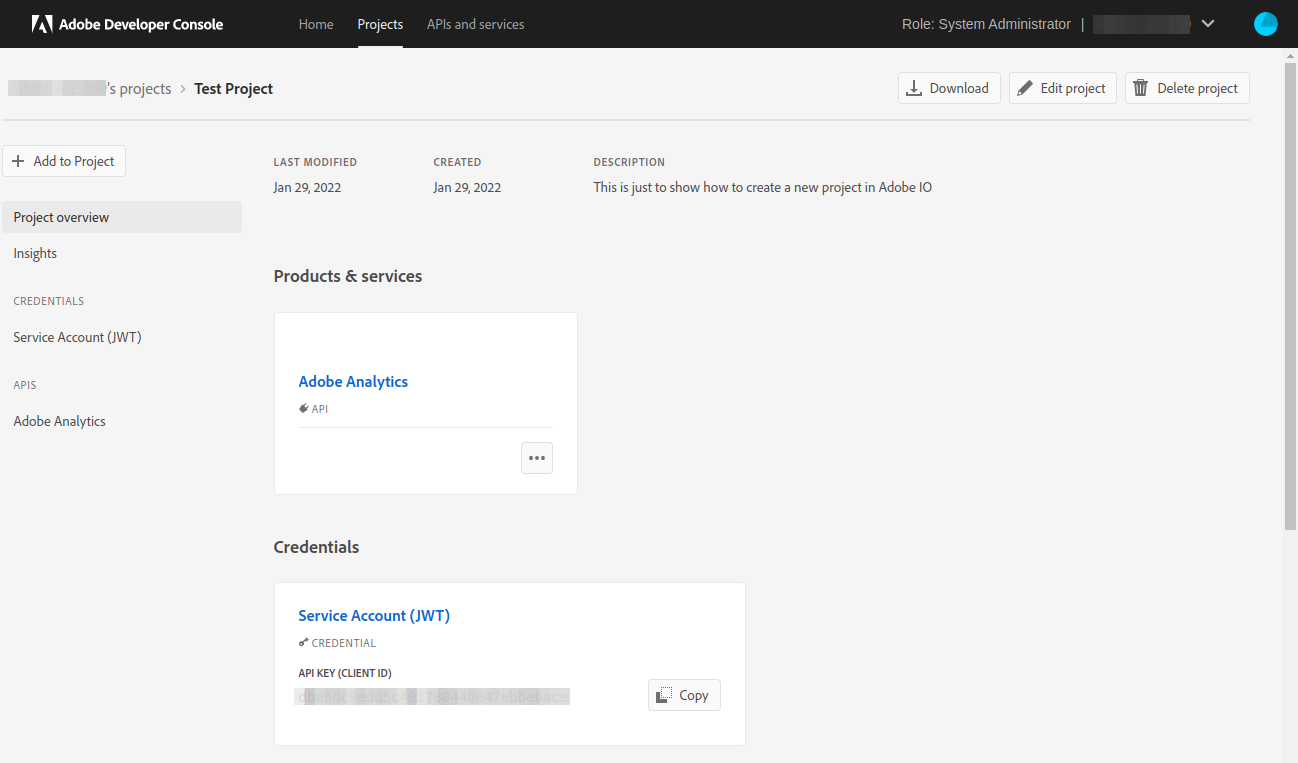
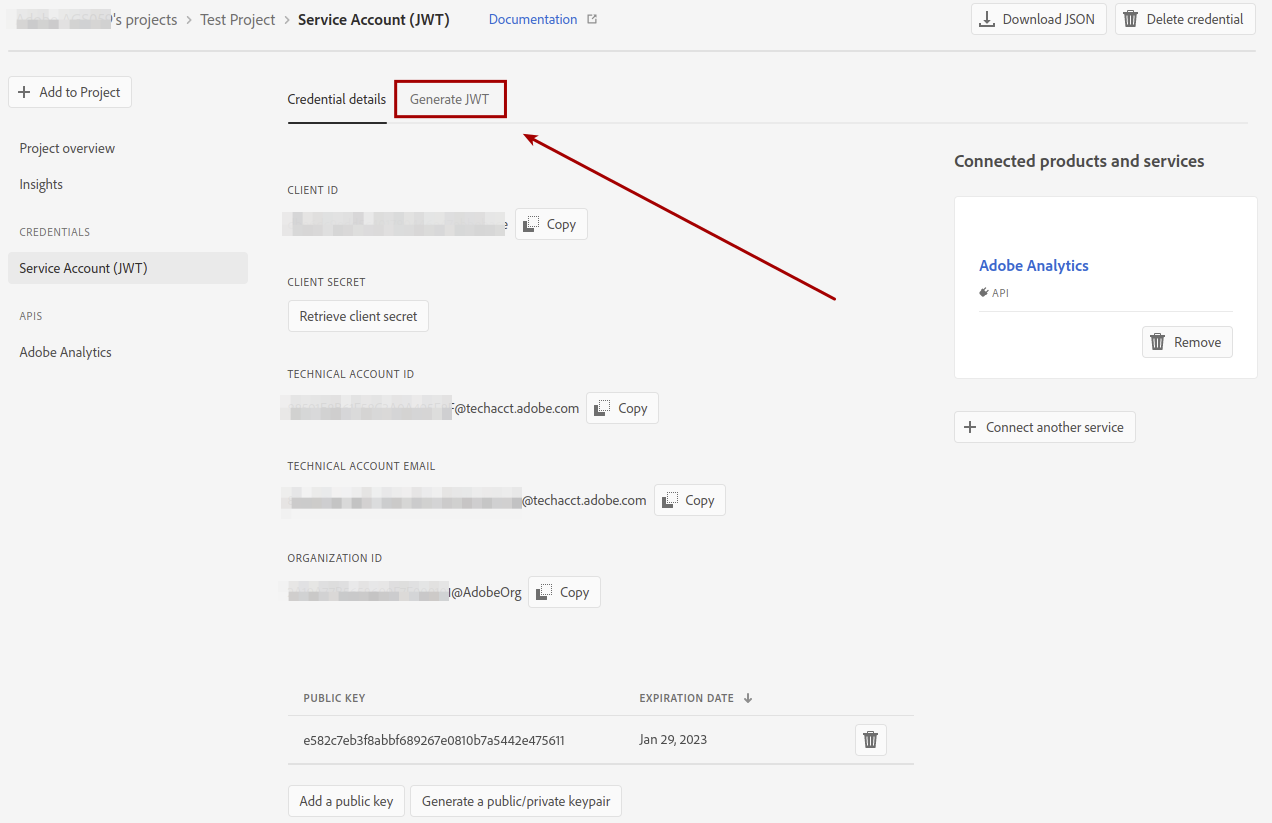
Click on “Service Account (JWT)” and, on the credentials page, click on “Generate JWT”:
That page will show you the JWT payload, which will a format like:
{
  "exp": <EXPIRATION>,
  "iss": "<ORGANIZATION ID>",
  "sub": "<TECHNICAL ACCOUNT ID>",
  "https://ims-na1.adobelogin.com/s/<API>": true,
  "aud": "https://ims-na1.adobelogin.com/c/<CLIENT ID>"
}
In case the parameters are not clear enough:
-
expis the expiration in seconds; I have always tried with the current timestamp + 86400 seconds (1 day) -
issis your organization ID, the one ending with@AdobeOrg -
subis your technical account ID, the one that looks like an email address (it is not, though), ending with@techacct.adobe.com - the fourth parameter includes the API type; in my example, using the Adobe Analytics API, the key is
https://ims-na1.adobelogin.com/s/ent_analytics_bulk_ingest_sdk -
audis a URL that contains from Client ID from your credential details page
The header is not shown, but it is always the same:
{
  "alg": "RS256"
}
Generate the JWT
At the bottom of the page “Generate JWT”, you can generate a sample JWT, by uploading the private key. Only do that if you feel comfortable with uploading your private key to Adobe servers.
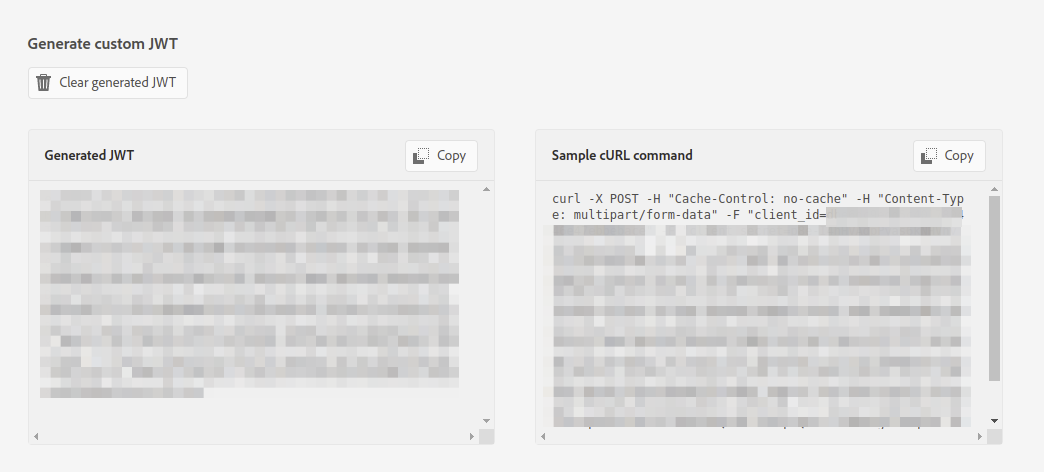
However, you must not use this JWT in your application; it is only meant for your manual tests. Remember that you need to set the expiration, which forces a new JWT to be generated every time. Also, if the private key expires, you will need to get a new one.
Instead, you have to generate the JWT every time you need it. Your library of choice should take care of it and you should only feed it with the header and payload, as explained in the previous section. In case you want to know what it does under the hood:
- Get the header, remove all unneeded spaces from the JSON string and encode it in Base64Url.
- Get the payload, remove all unneeded spaces from the JSON string and encode it in Base64Url.
- Concatenate the outputs of 1 and 2, using a
.as the separator. - Using the private key of the Adobe IO account, sign the output of step 3, using SHA256 and encode it in Base64Url.
- Generate the JWT as the concatenation of 1, 2 and 4, using a
.as the separator.
And that’s it!
Well, you know what I mean. It sounds simple, but it never is. If you get stuck and need to see where you are getting it wrong, I suggest you use this JWT Debugger. You can even try it with the Adobe generated JWT.
Authentication
You will have also noticed that, next to the generated JWT, you get a sample curl command to authenticate against Adobe IO. Again, this is only for testing purposes but it is still a good starting point for you to understand the authentication process. Let me decompose this command for you:
$ curl -X POST \
    -H "Cache-Control: no-cache" \
    -H "Content-Type: multipart/form-data" \
    -F "client_id=<CLIENT ID>" \
    -F "client_secret=<CLIENT SECRET>" \
    -F "jwt_token=<JWT>" \
    "https://ims-na1.adobelogin.com/ims/exchange/jwt/"
In summary, you need to make a POST call to https://ims-na1.adobelogin.com/ims/exchange/jwt/, with the following parameters: Client ID, Client Secret and JWT. The response, if successful, will be a JSON object with these key/value pairs:
{
  "token_type":"bearer",
  "access_token":"eyJhbGciOiJSUzI1NiI.......",
  "expires_in":86399999
}
I find it a bit confusing that, while the exp parameter in the JWT is a UNIX timestamp in seconds, the expires_in is the number of milliseconds until this token expires.
Accessing the API
Now you have everything you need to access the Adobe API you configured in Adobe IO. You need to include an extra HTTP header in all requests:
Authorization: Bearer <ACCESS TOKEN>
Just to be clear, <ACCESS TOKEN> is the same as access_token in the JSON response.
Remember to get a new access token before it expires, by following the same authentication process.
Photo by Big Potato on Unsplash