
Debugging Adobe Tools with Charles - Part II
28 Nov 2021 » MSA
This post is the last of my mini-series on debugging with Charles. If you have not read the previous posts, you should, before you continue: Introduction to HTTP debuggers and Debugging Adobe Tools with Charles - Part I. In this post, I will skip some obvious steps, as I assume that you are familiar with Charles by now. If something is not clear, please, let me know in the comments.
Inject Launch tags
This is especially useful if you are migrating from a previous tag manager or are working on a fresh new Adobe implementation. Usually, you should have access to a lower environment of the website, where the developers would have added the Launch tags. However, this may sometimes take a while and you want to start working immediately. Or you want to test your latest changes on the production website before there is any Launch code published.
In this situation, what you want is to modify the HTML of the website, only for your browser, to test your Launch code. Here you have the steps:
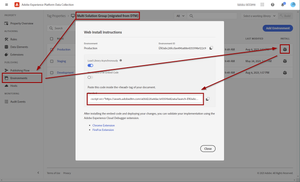
- In Launch, under environments, get the “Web Install Instructions”. There are small differences depending on whether you want to load Launch synchronously or asynchronously.
- In a new tab, open the web page where you want to inject Launch.
- In Charles, find the HTTP call to the HTML. You may need to enable SSL debugging. This is just to make sure Charles can read the data.
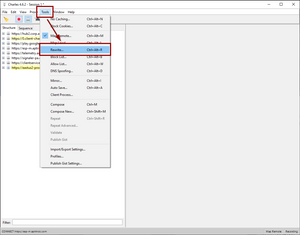
- Still, in Charles, go to Tools > Rewrite.
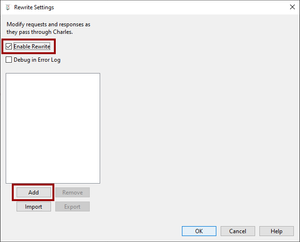
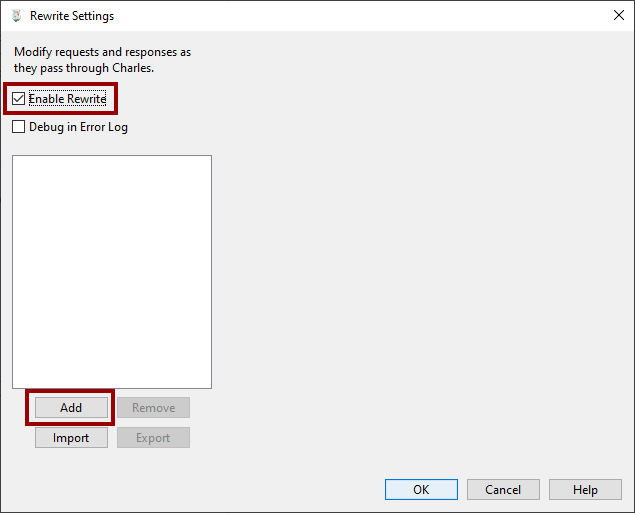
- In the dialogue, select “Enable Rewrite” and click on “Add”.
- Now you should get a new set of forms on the right. Set a name at the top.
- The top-right section is to select the URLs where you want to inject Launch. Click on the “Add” button and populate the new dialogue with the information about the URL. Repeat for all URLs that you want to test.
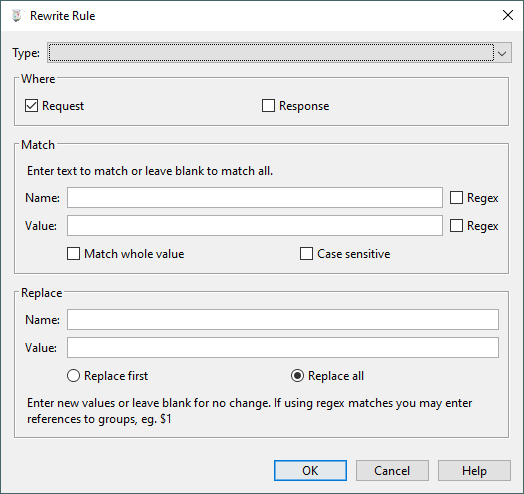
- The bottom-right section is where you configure the rewrite itself. Click on “Add” at the bottom and a new dialogue will appear.

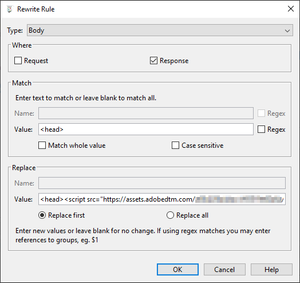
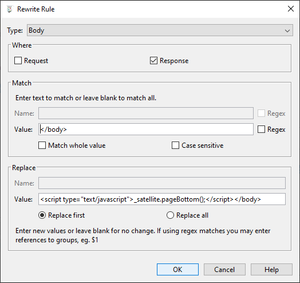
- Set the following values in this new dialogue:
- Type: Body
- Where: Response
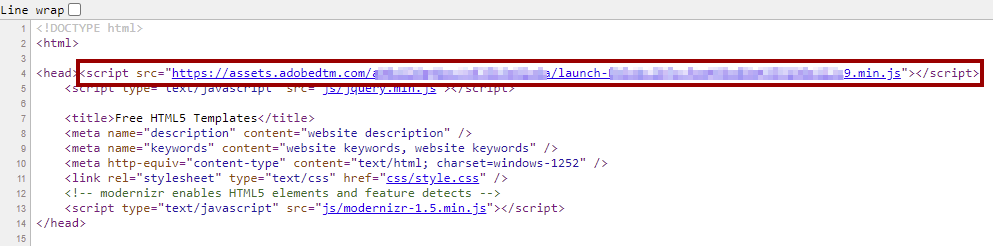
- Match: Value:
<head> - Replace: Value:
<head><script src="https://assets.adobedtm.com..."></script>; the<script>tag is the one you get from Launch’s environment (step 1) - Replace first
- Click on “OK”. You have now configured Charles to add the top-of-the-page Launch snippet.
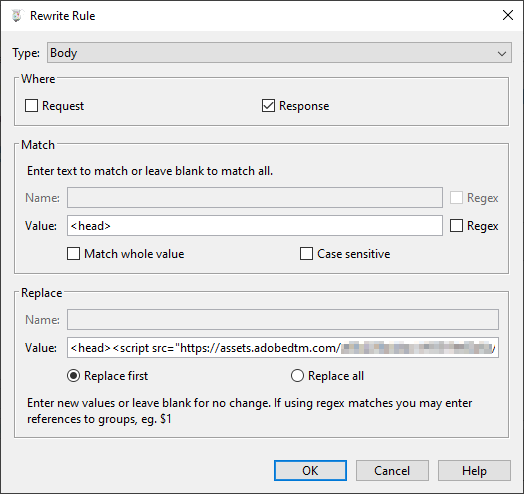
- If you are using Launch synchronously, you also need to add the bottom-of-the-page snippet. The process is very similar: click on “Add” again at the bottom-right of the dialogue (as in step 8) and set the following values in the new dialogue:
- Type: Body
- Where: Response
- Match: Value:
</body> - Replace: Value:
<script type="text/javascript">_satellite.pageBottom();</script></body>; - Replace first
- Click on “OK”.
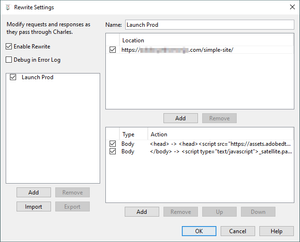
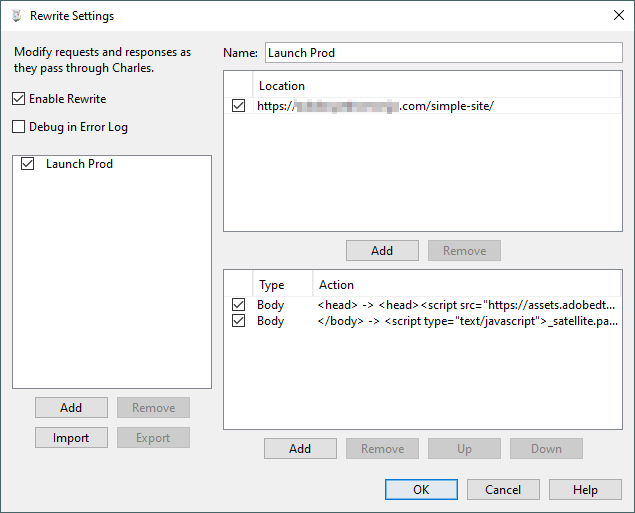
- You should now see the summary of changes to add Launch. The next screenshot is for Launch loaded synchronously. If you want it asynchronous, the second action should not be present.
- Force a full reload of the page that was configured in step 7.
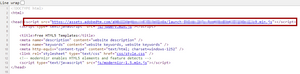
- Check the HTML of the page; you should see the Launch code.


It took a few steps, but now you have Launch running in your browser, without having to deploy any code in the website’s production environment. You can also use the same mechanism to add a data layer, for example.
Debug mobile implementations
Everything I have explained in the previous and current posts can be applied to mobile environments: web and app. However, there are no browser developer tools in mobile browsers. Today I learnt that there is a version of Charles for iOS, but I have never tried it. If you feel adventurous, feel free to try it and let me know how did it go in the comments.
Instead, I will explain to you a generic way to debug your Adobe implementation on a mobile device. The basis is to route all your mobile traffic through Charles. Let me warn you that it is not easy and that I cannot guide you step by step.
Network
To start with, you need to make sure both your mobile device and your desktop/laptop are on the same network. In general, it suffices that both are on the same WiFi. If you have more complex scenarios, you should seek advice from your IT team; it is beyond this post to explain all potential combinations.
Get proxy network parameters
The first step you need is the TCP port Charles is listening on. Go to the menu Proxy > Proxy Settings…
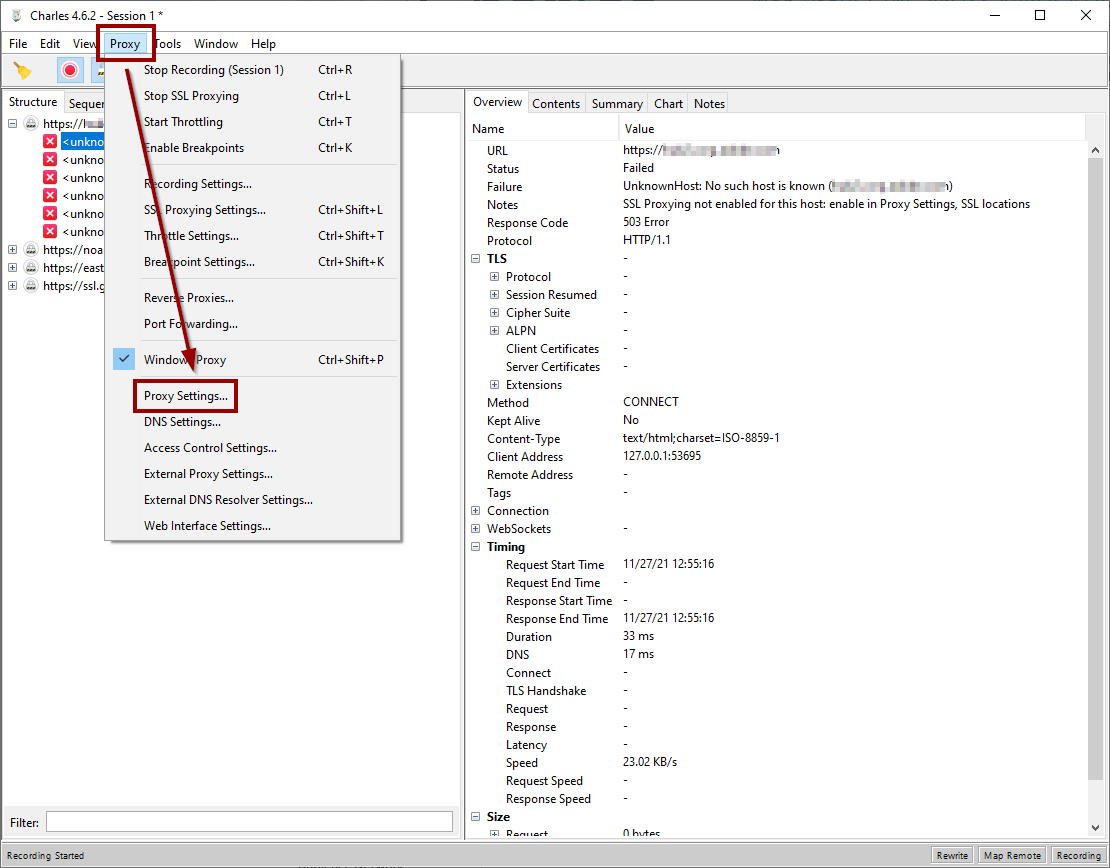
Copy the port number you get; in my case, it is 8888:

The second step is to get your computer’s local IP (v4) address. This will depend on your operating system:
- Windows 10. With the different versions and configurations, I suggest you try one of the options explained by: How-To Geek: https://www.howtogeek.com/723838/how-to-find-your-ip-address-on-a-windows-10-pc/.
- Mac. I do not have a Mac, so I cannot even take a screenshot of how it would look like. I would try what HelloTech describes (I could not find a How-To Geek guide): https://www.hellotech.com/guide/for/how-to-find-ip-address-on-mac.
-
Linux. If you are using Linux, chances are that you know what you are doing. Just open a command line terminal and type
ifconfigorip addr.
Configure your mobile device’s proxy
Now it is when you get to the complicated part. You need to configure your mobile device to use Charles as a proxy. Again, it depends on your operating system:
- iOS. All I can suggest is that you follow an existing tutorial, as I do not own an iPhone. I recommend How-To Geek: https://www.howtogeek.com/293676/how-to-configure-a-proxy-server-on-an-iphone-or-ipad/.
-
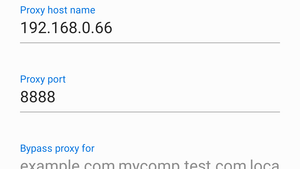
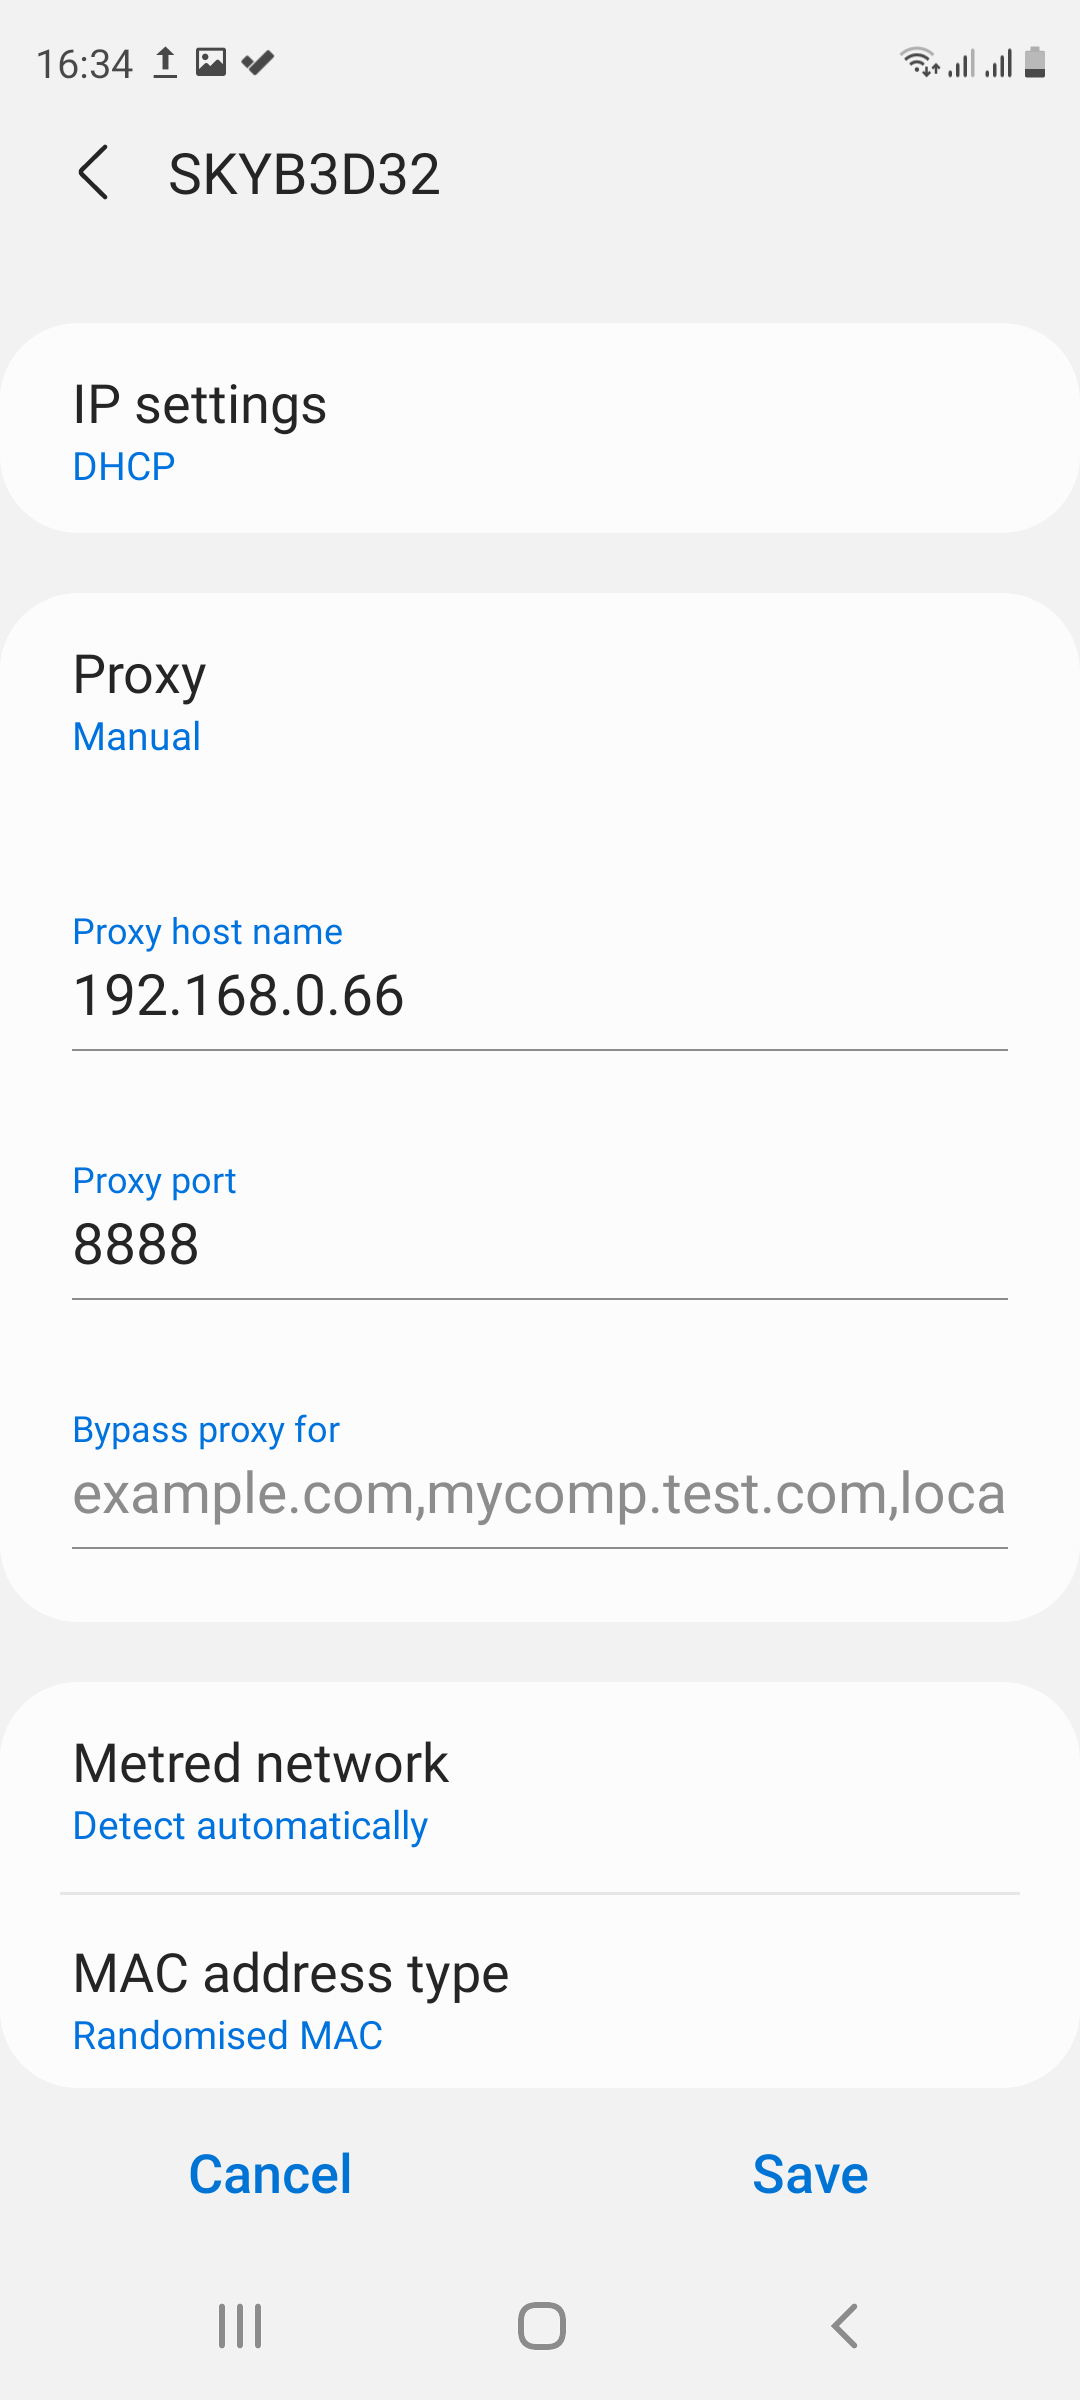
Android. As much as I prefer Android over iOS, I have to admit that, for this particular configuration, Android is so much more complex. The reason is that mobile manufacturers customise Android so much, that they differ a lot. In summary, you need to go to the WiFi settings, select the WiFi network that you are connected to and change the proxy configuration from “None” to “Manual”. Then, enter the IP address of your laptop/desktop and Charles’ port, which you should have from the previous step. This is how it looks like in my Samsung device:
Accept the connection from your device
Charles has an additional security feature. By default, it denies any connection from external devices. So, as soon as you have finished configuring the proxy, Charles will show a message like the following:
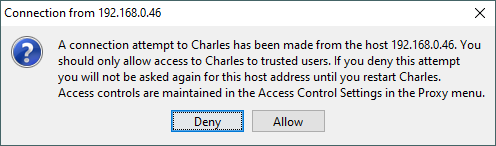
It goes without saying that you should accept it unless you suspect it is not your device connecting to it.
So, after all this lengthy process, you have your mobile traffic going through Charles.
SSL certificates
Do not smile just yet, we have not finished. Now you need to install Charles Root Certificates on your mobile device. Open your mobile browser and go to https://chls.pro/ssl. This will download the certificate. The process is, as usual, different depending on your OS:
- iOS. According to Charles SSL certificates documentation, Safari should prompt you to install it. If you are on iOS 10.3 or later, open the Settings.app and navigate to General > About > Certificate Trust Settings, and find the Charles Proxy certificate, and switch it on.
-
Android. My beloved Android is, again, a pain. In the case of my Samsung, I have to go to “Other security settings” to find the option to install certificates:
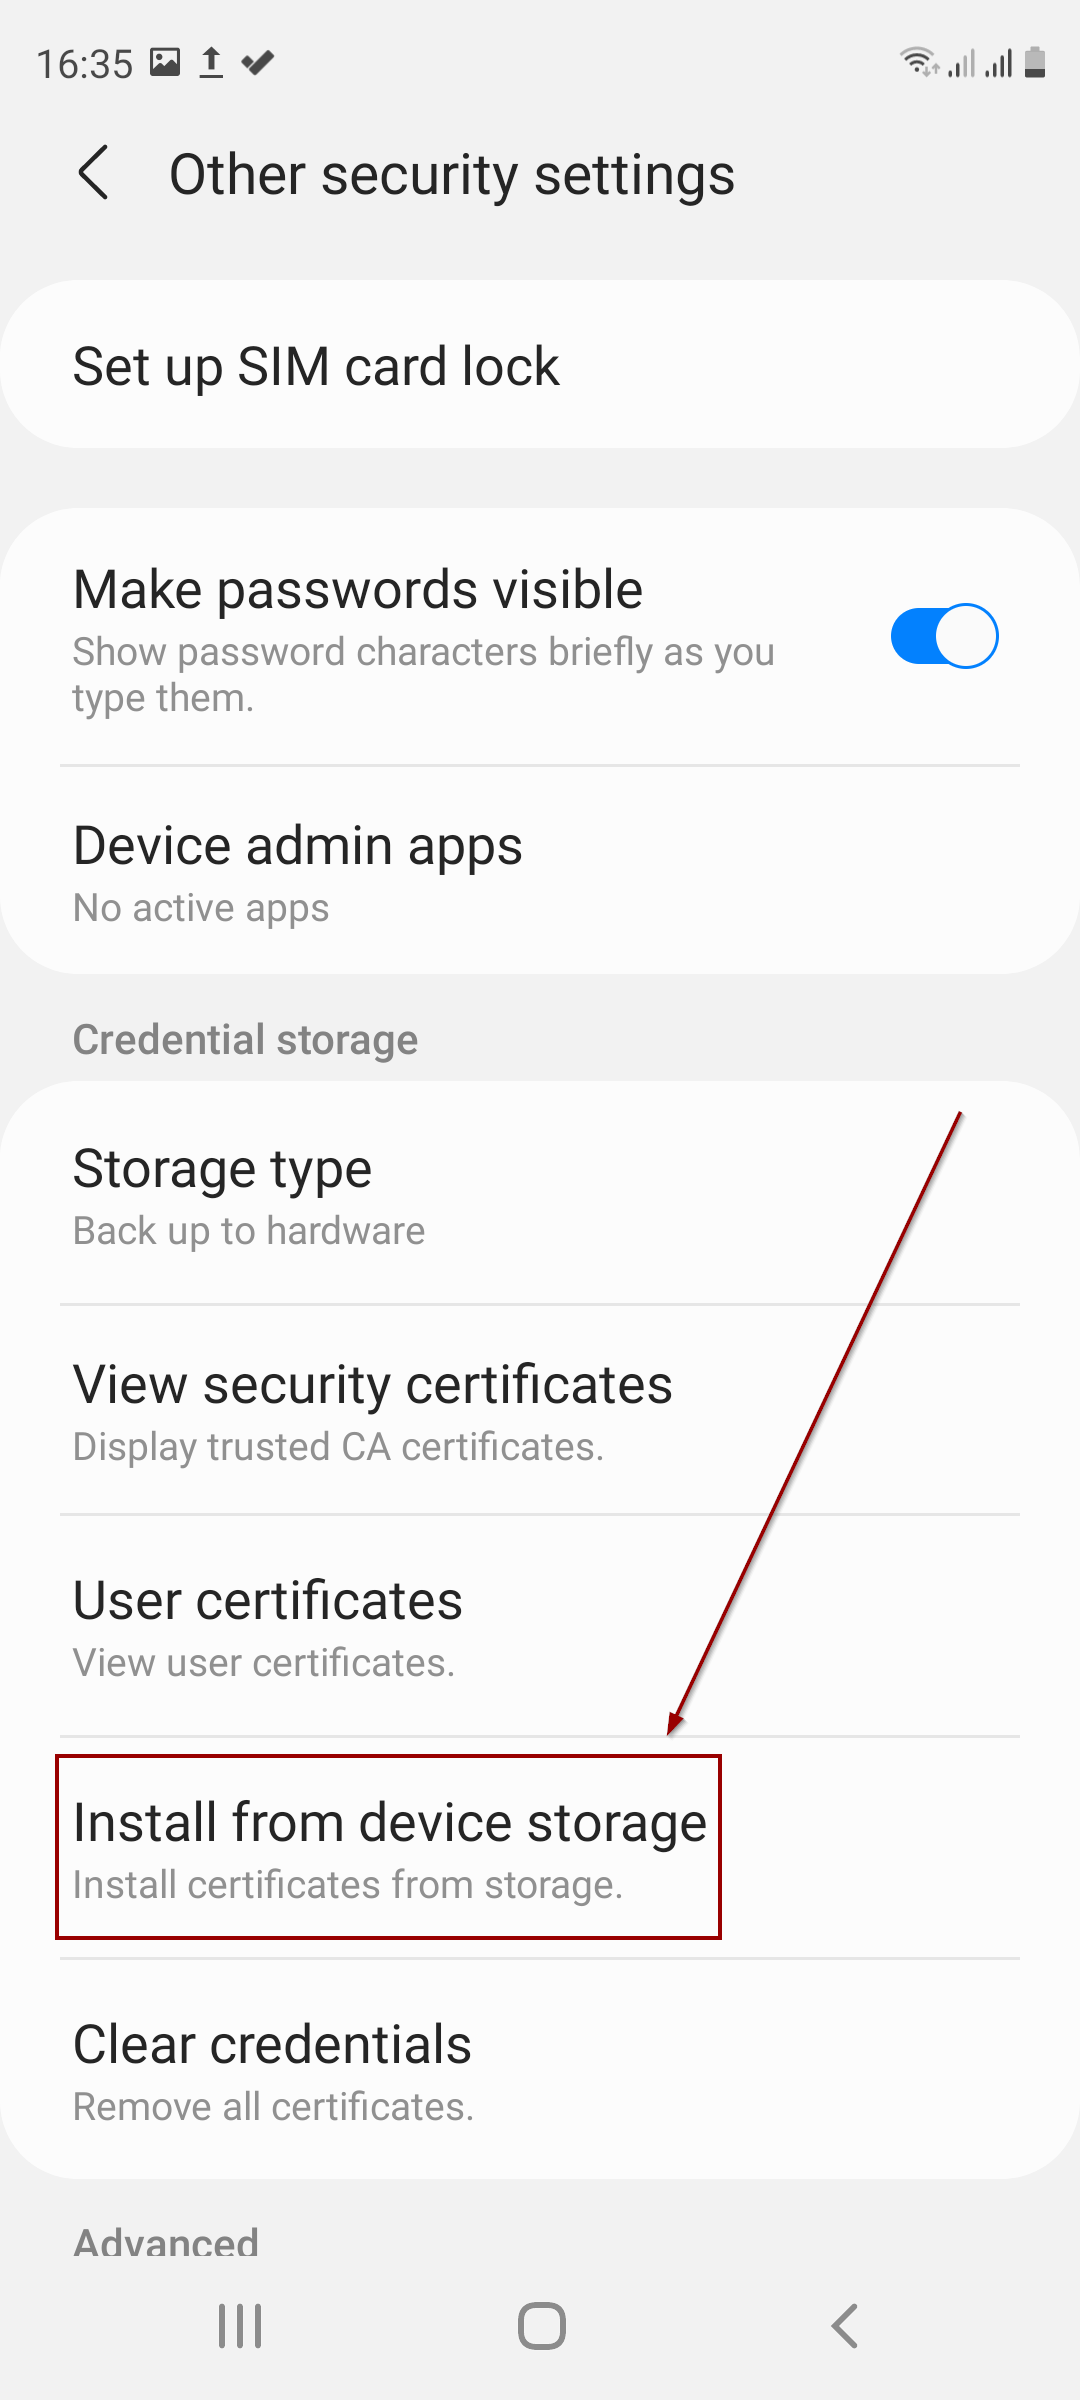
Done!
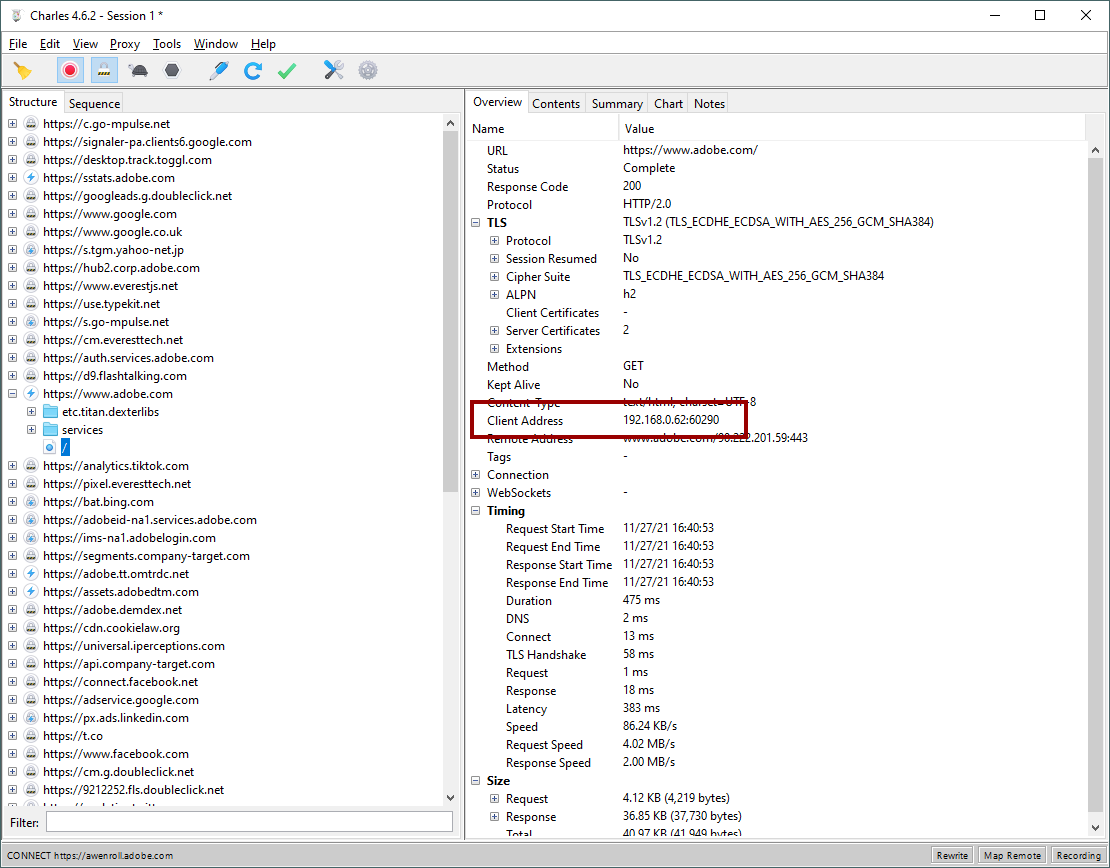
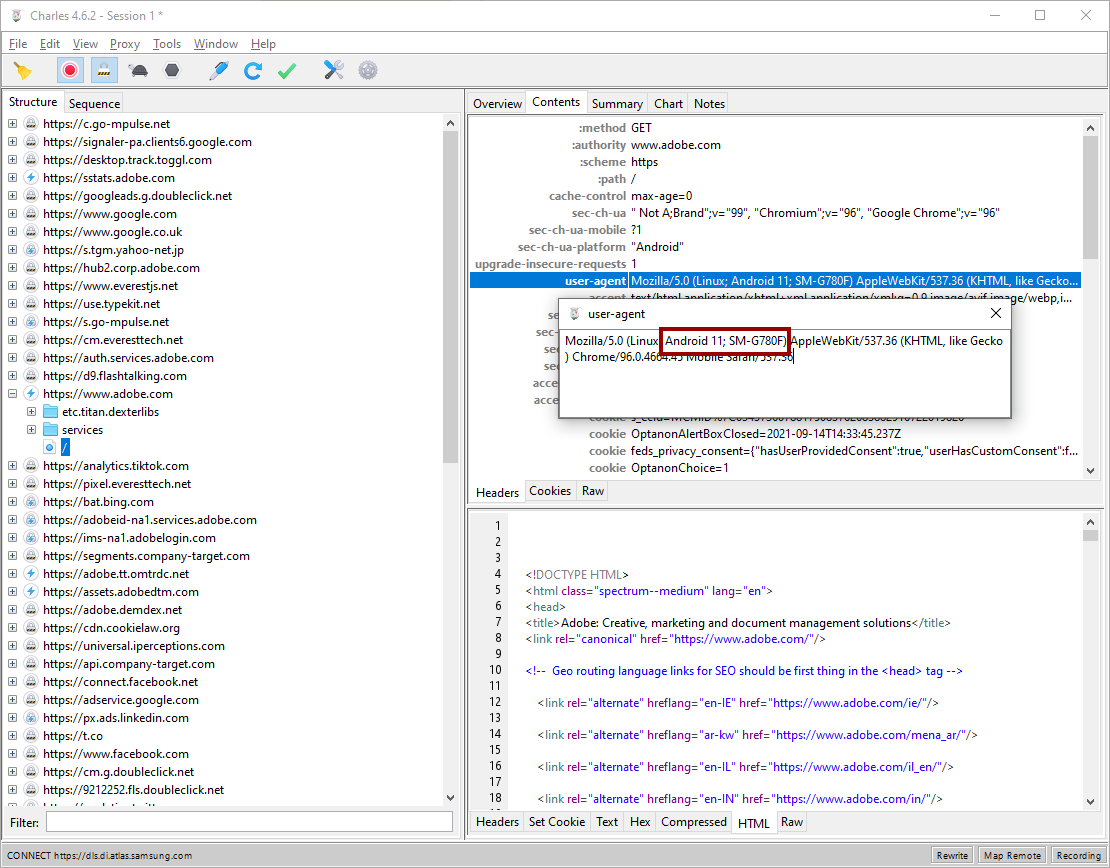
Now you should see all mobile traffic flowing through Charles and, if you enable SSL proxying, your mobile browser should not complain. However, since the process I have shown can fail in many places, I suggest you do a final confirmation. In Charles, select a request that you would expect to be coming from your mobile device and, in the “Overview” tab, check that the “Client Address” has the IP address of your device:
If you do not know how to get your device’s IP address, you can also check the User-Agent. Go to the “Contents” tab and double click on “user-agent” to see the full string. The value should confirm that the browser is in Android or iOS. In my case:
Finally, do not forget to disable the proxy configuration in your device when you finish debugging. Otherwise, when you stop Charles or you move to another network, you will not be able to connect to any website from your mobile browser. If you are never again going to use Charles with your mobile device, I would also suggest you delete the certificate.
Photo by Campaign Creators on Unsplash