
Multi-tenancy in Audience Manager
Now that I have clarified the data sources in Audience Manager, I can explain how to manage multi-tenancy in Audience Manager. If you have not read that post, please do so before proceeding with this one. But if you have, let’s get started!
Before I get into the details, I need to clarify that this post shows the process as of the day of publishing this post. As you will see, the setup requires configuring both Audience Manager and the Admin Console. However, in the future, this process will change and the Admin Console will manage the whole setup.
Understanding multi-tenancy in Audience Manager
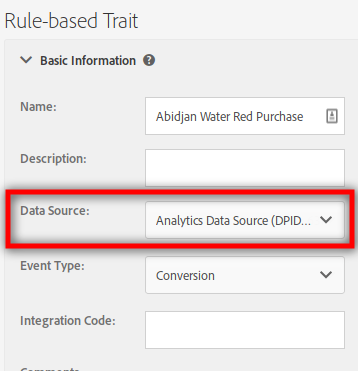
In the case of multi-tenancy in Analytics, since each report suite is totally isolated, it is fairly easy to separate the data. However, Audience Manager is completely different. You have only one AAM instance and this instance holds all the data, with no logical or physical separation available. In fact, this makes sense, as you want a single profile for each device or user. What AAM allows you is to separate access to the traits and segments, by means of the data source selected when creating the trait or segment.
Remember that, for real-time traits, the data source plays no other role. Destinations are simpler and are treated individually.
The last piece of this puzzle is the user groups in AAM, which limit access to traits and segments based on the data source.
With the previous explanation, I hope it is obvious how AAM caters for multi-tenancy. The idea is to create user groups, where each group can only access a selection of traits, segments and destinations, corresponding to a tenant. In the simplest configuration, 1 group = 1 tenant, although you can create more refinements if needed.
User groups in Audience Manager
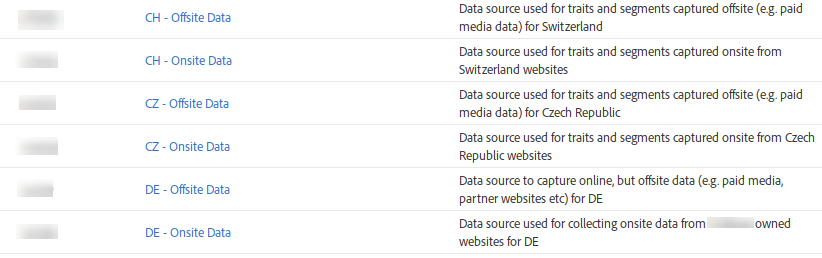
Usually, you will start by creating twice as many data sources as tenants you have: one for real-time traits and the other for onboarded traits. It goes without saying that you need to follow a naming convention for the data sources. The following is an examples where each tenant is a country:
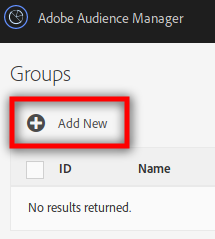
The next step is to create the groups in AAM, under Administration > Groups. Start by clicking on “+ New”:
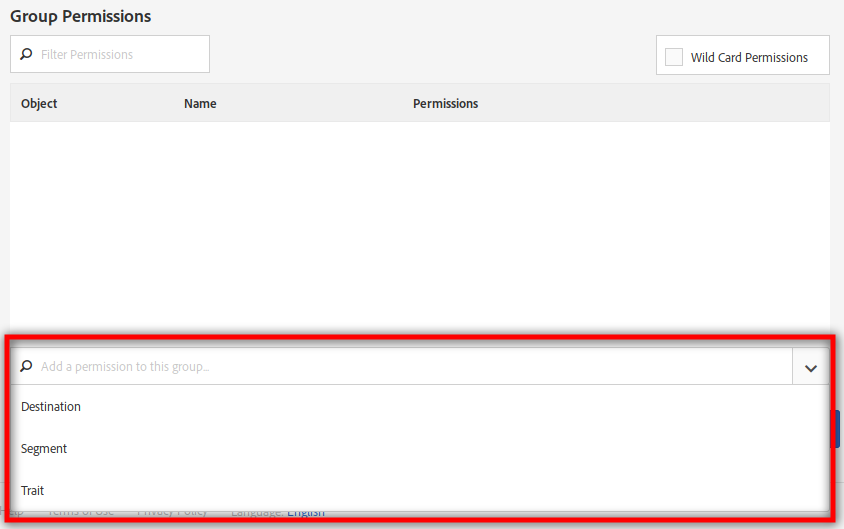
Give it a name (again, following a naming convention) and a long description. Scroll to the bottom of the page, to the “Group permissions” section. This is where you configure the actual permissions for the group. A group is, basically, a combination of multiple of the following pairs of permissions:
- Trait: data source + operation
- Segment: data source + operation
- Destination: destination + operation
To establish these permissions, you start by selecting the type of data: trait, segment or destination.
A list of data sources (traits and segments) or destinations shows up, depending on the data type. Click on the chevron next to the data source or destination for that tenant, and the list of operations will appear:
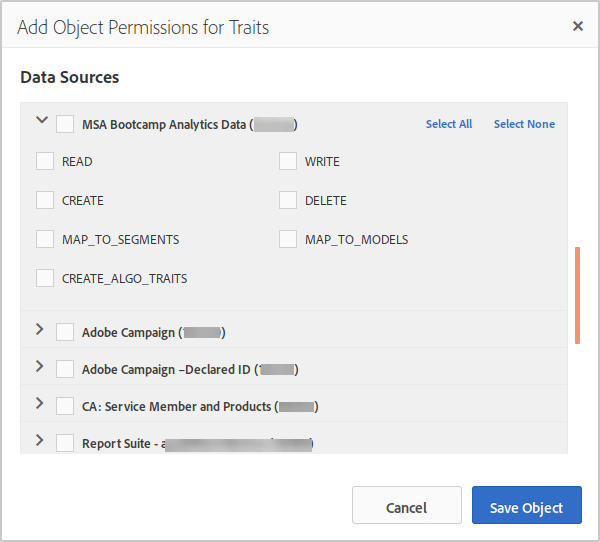

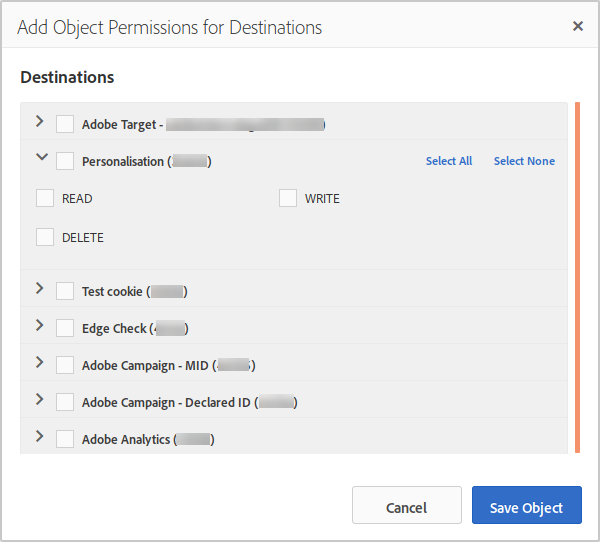
The next step is to select the permissions you want. You need to iterate through all data sources or destinations, adding all the permission that correspond to this tenant.
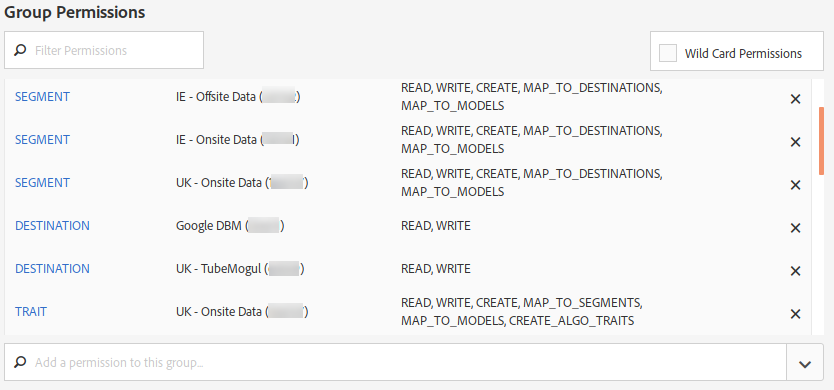
Click on “Save Object” when you finish the permissions for each type of data. As mentioned above, in a simple case, you would create one group per tenant, where you would grant all permissions to the data sources and destinations corresponding to that tenant. However, fine-grained options can also be created, selecting sub-sets of the permissions for each data source or destination. As you can see, AAM options are almost limitless.
Finally, you should get something like:
Save it. You have finished the difficult part!
Product profiles in Admin Console
Now you need to switch to the Adobe Admin Console and go to the product profiles list for AAM:
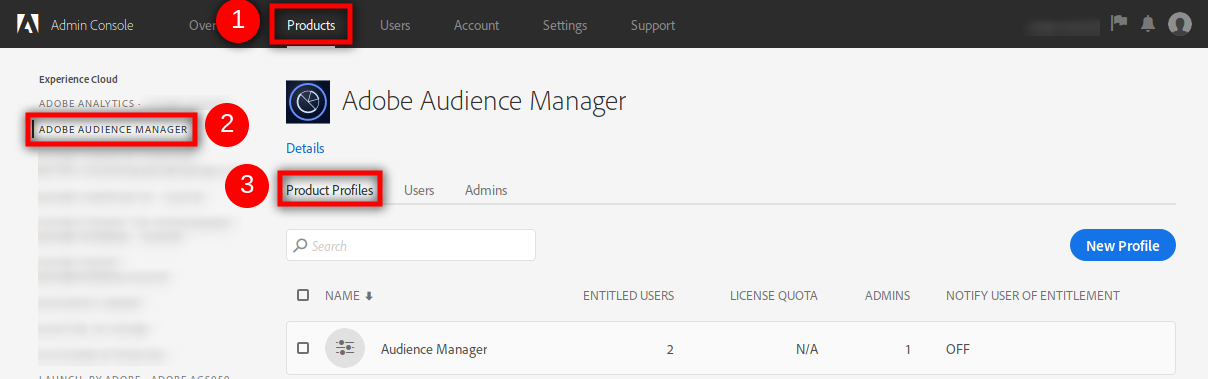
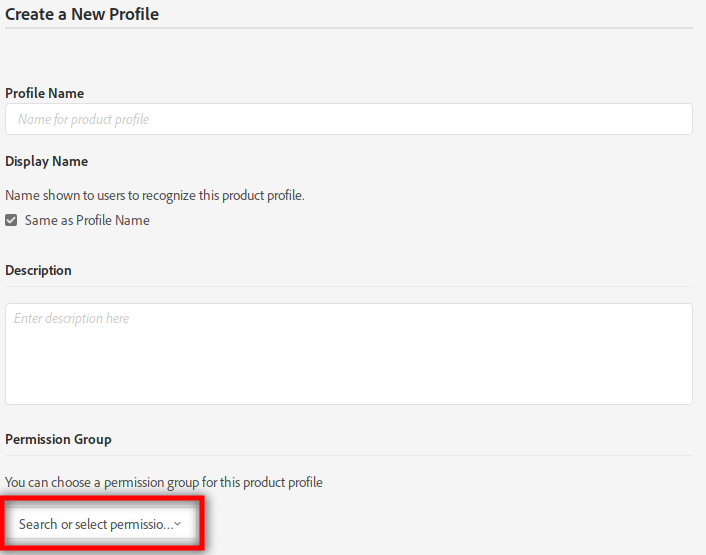
The next obvious step, is to create a new product profile, clicking on the “New Profile” blue button. As with all product profiles, you need to supply a name and a description. What is unique in the case of AAM is the “Permission Group” section, where you have to select one of the AAM user groups you have created in the previous section. It is recommended that the product profile name is the same as the AAM user group name or very similar.
Click on “Done”. You have now mapped a product profile in the Admin Console with a user group in AAM. Repeat for all user groups in AAM and you have a working multi-tenant AAM.
One final comment (repetition in fact). This process is very likely to change in the future. I will update the blog post once this happens.