
Adobe Mobile SDK
22 Oct 2017 » Mobile
So you have started developing an app and you want to use your existing Adobe license. You have already added it to Adobe Mobile Services. Now, it is time to add the Adobe Mobile SDK to your application and configure it.
I have to admit it: I am not a mobile apps developer. I have been a developer in the past, using various languages. However, that was before mobile operating systems became mainstream. For those of you old enough, my first and only attempt at mobile development was with Symbian more than 10 years ago. Since I am familiar with Java and I cannot get my head around Objective-C, I will use Android code in my examples below. Other operating systems will have equivalent code.
Supported environments
Adobe has versions of the SDK for a wide range of operating systems and development environments: Android, iOS, Windows, PhoneGap… You can see the full list in this help page. But, as I am sure you already know, with Blackberry’s gloomy future and Microsoft not knowing what to do with Windows Phones, the battle in the mobile arena is only between iOS and Android. As a consequence, the Adobe Mobile SDK for these two OSes are updated more often than the other environments. Just check the versions.
Download the SDKs
There are a couple of places where you can download the SDK. The best place to do that is directly from the Mobile Services UI, in the configuration page:
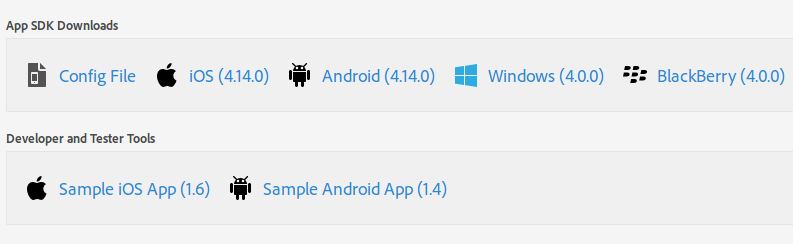
The reason why I recommend this location is because, together with the library, you get a copy of the JSON configuration file. This file contains the settings from this same page, plus some app-specific settings. If you are curious about the contents of this file, just head to the official documentation.
Alternatively, you can download the SDK from the Adobe Github page. In this case, you will not get the JSON file, which will need to be downloaded from the Mobile Services UI.
Configure the Adobe Mobile SDK
Now that you have the library and the JSON configuration file, it is time to include it in your IDE. Follow the instructions for Android and for iOS. You should have already created the report suite, so you can safely ignore any reference to that. What is more important is to enable the lifecycle metrics and set the right permissions for the app. For now, we will not use additional data and lifecycle calls.
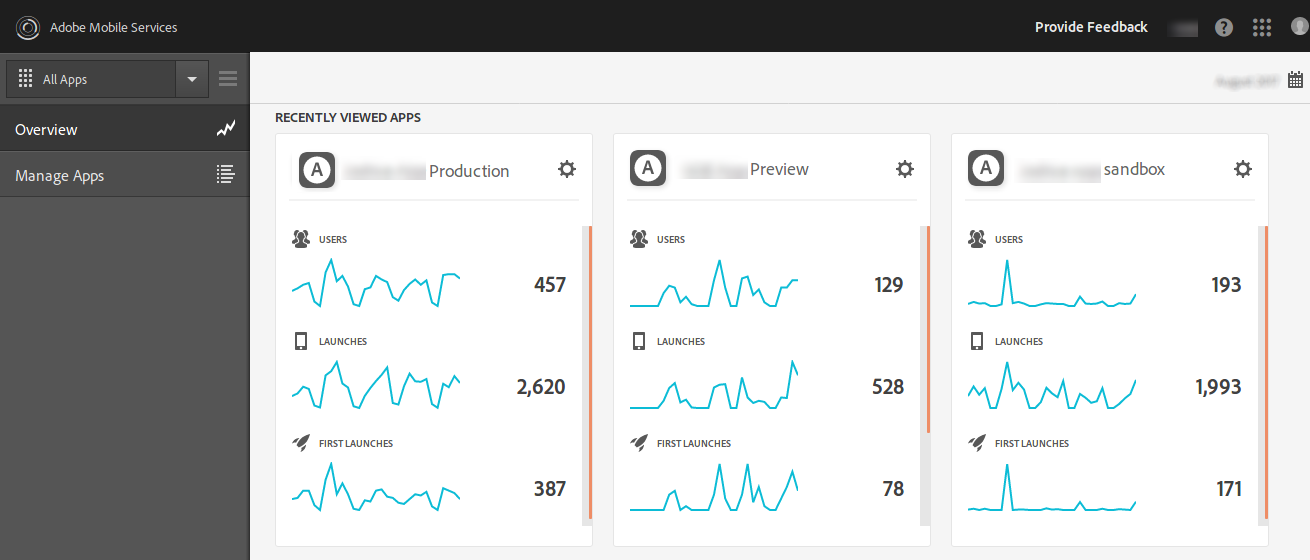
At this point in time, you have the SDK added to your project. Being a wise developer, you will have multiple environments: production, staging, development… Each environment requires its own app in the Adobe Mobile Services:
As a consequence, each app in the UI will have its own configuration file. In all cases, the app is basically the same. The Adobe Mobile SDK does not offer any option to select which configuration file to load. Upon app launch, the SDK will load the default JSON file. You might then wonder: “how do I change the configuration file, depending on the environment?”
Fortunately, the SDK offers a method to override the default JSON file with a different one: public static void overrideConfigStream(final InputStream configInput). It is very important that you call this method at the very beginning of the app, before the SDK sends the first lifecycle hit. Otherwise, the default configuration is used. You just need to add some logic to detect in which environment you are, call the previous function and the SDK will take care of the rest. My suggestion is to use the production version of the JSON file as the default file and load alternate configurations in development, staging…
If everything goes well, your app should now send lifecycle metrics when it launches. After a few tests and after waiting about 90 minutes, you should see some metrics like users, launches and first launches in the Adobe Mobile Services UI and in Adobe Analytics. You have successfully added the SDK!
Debugging the implementation
Unfortunately, life is not that rosy and you probably are not seing the data you were expecting. The first tool to debug your code is to use the IDE itself (I know, you do that every day). However, you will soon reach a point where the code seems OK, but your friendly marketeer complains that the data is wrong. I then recommend using an HTTP debugger, to view all the calls made from the SDK to Adobe’s servers.
Adobe offers Bloodhound for both Windows and Mac OS. This is a free tool, but it is not actively developed. Another tool is Fiddler, which I used once long time ago. However, I strongly recommend Charles, which is by and large the best HTTP analyser in the market. Many of my customers are already familiar with Charles, so most of them will know how to proceed from here. However, if this is the first time you have heard about it, stay tuned, as I will write about it in another post.
If you are already familiar with Charles and have it configured, you will want to check the calls are OK. Since you only have the default calls, which include only lifecycle metrics, you only need to check that the values make sense and are sent when expected. In the calls to Adobe’s server, you will see them between “a.” and “.a”:
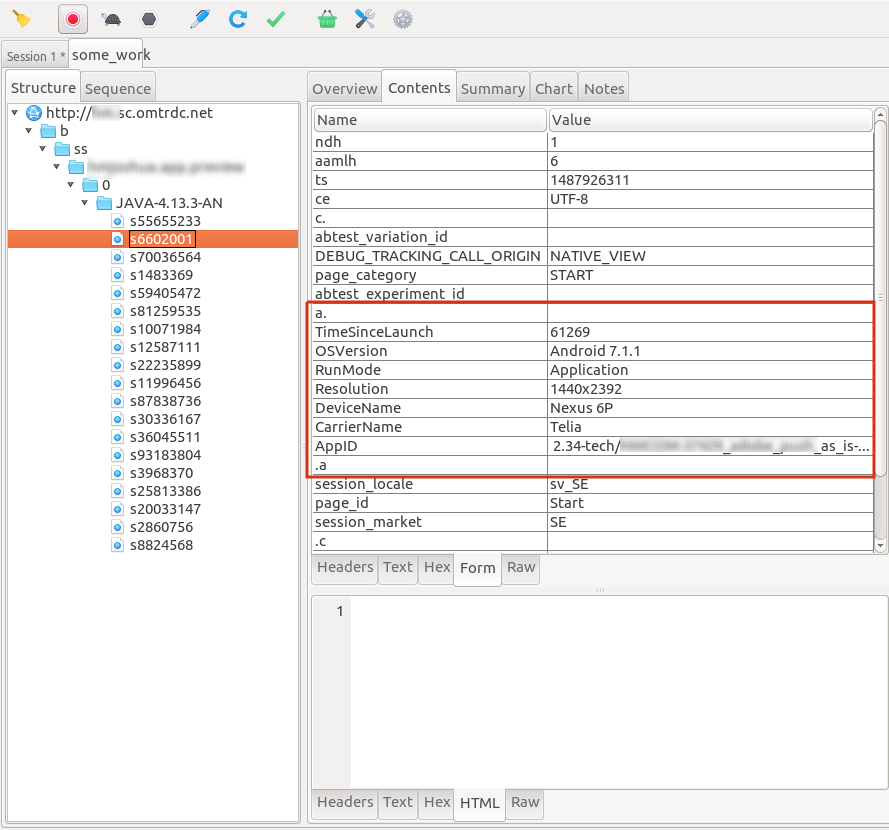
The SDK does not send all lifecycle metrics with every call. For example, the launch event will be sent, well, only upon launching the app. I will not go through all of these metrics, as there are dozens. In care you want to dig a bit more, here you have a comprehensive list. However, you should not worry if the correct metrics are sent with each hit, as the SDK takes care of that. As long as the values are correct, your job is done here.