
Tutorial AEM-Launch Integration
01 Aug 2021 » Launch , Content
I have had to recently help a customer with the integration of Adobe Experience Manager (AEM) with Adobe Launch. If you have been following this blog for a while, you already know that my area of expertise is not precisely AEM, so I had to do the whole process to learn it first. To keep it handy for the future, I thought I would share the experience with all of you.
Over the years, I have noticed that, when it comes to technical descriptions, there are two types of people: those who prefer to read it and those who prefer to watch a video. If you prefer videos, then you should watch this series in the Experience League. However, if you are like me and prefer to read the process on one window/screen and apply it on another one, you are in the right place :-)
While, conceptually, this may not be the most complex integration you can find between Adobe tools, it is a bit tricky, as you need to play with 4 different interfaces: AEM, Launch, Admin Console and Adobe IO. Also, since this tutorial touches so many points, I will not be as detailed as I usually am.
I will also assume that you have the right permissions to do all the operations I am going to explain. It is way beyond this tutorial to explain how to configure the permissions for your user. In doubt, you should get support from the system administrator of the Adobe Admin Console for your organisation and your AEM instance. Either you can be granted the right permissions or work with different individuals who have the right access to the tools involved in this process. Admittedly, this requirement will add another level of complexity.
Before I start with the explanation, I also want to highlight that I am using AEM 6.5.9 running on my laptop. This should be the same for any hosted AEM and AEM managed by Adobe (Managed Services). I do not have access to AEM as a Cloud Service (AEMaaCS), so I am not 100% sure how the AEM steps will look like there.
Launch property
The first step is to have a Launch property, which you are going to use for this integration. There is no need to create a new one if you are going to use an existing one.
However, if you are starting from scratch, should create one first.
-
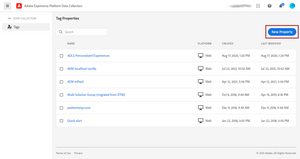
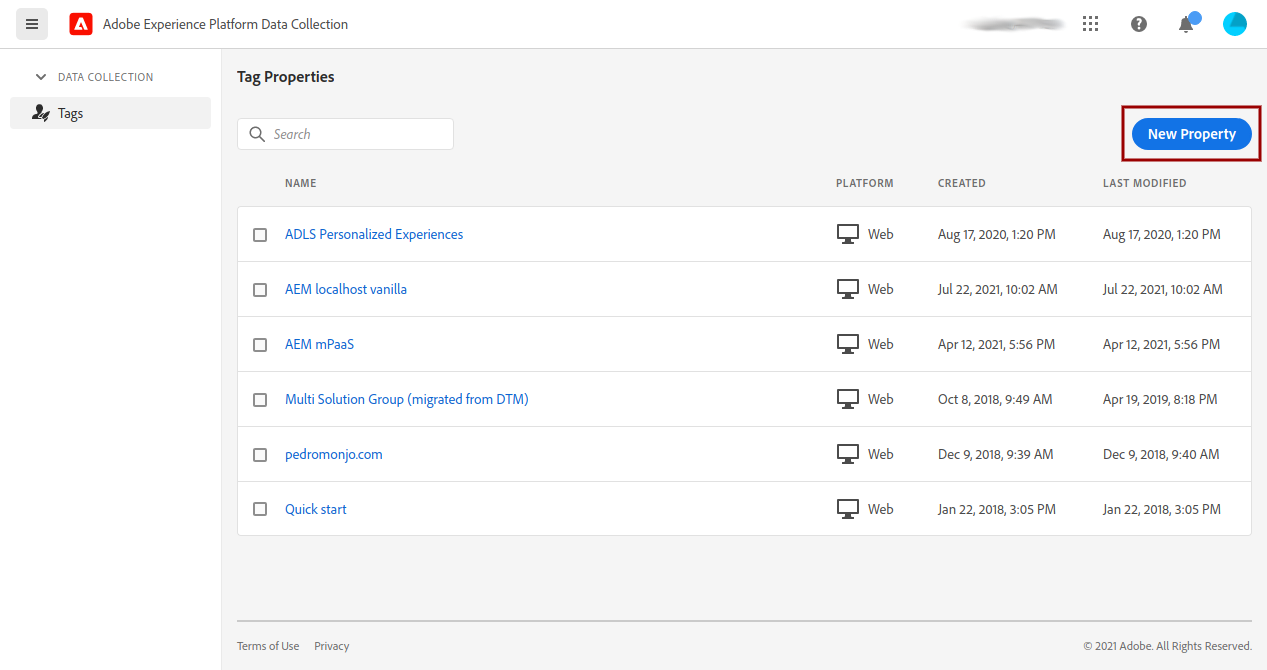
Go to the Launch UI. Make sure that you are in the correct organisation.
-
On the “Tag Properties” page, click on “New Property”.
-
Choose an appropriate name and set the domain where it will be deployed.
That should give you the minimum you need to continue. However, if you are familiar with Launch, I would suggest that you add the Core extension to a library and publish it. This will make sure the Launch URLs have something.
Configure a Product Profile
Now you need to create a product profile that grants access to the newly created Launch property. If you are using an existing web property, you may have it already in one or multiple product profiles. However, I would suggest having a product profile for technical integrations.
-
Go to the Adobe Admin Console. Confirm that you are in the same organisation where you have created the Launch property.
-
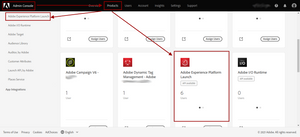
Click on “Products” in the top menu.
-
Locate the card for “Adobe Experience Platform Launch” and click on it. Do not click on the “more options” or “Assign Users” buttons. You can also find the link on the left menu.
-
Click on “New Profile” to create a new one and give it a name. There are some optional fields that you may want to populate so that you know in the future why you created this product profile. I would disable the notification at the bottom (notify users by email).
-
You should have been sent back to the list of product profiles for Launch.
-
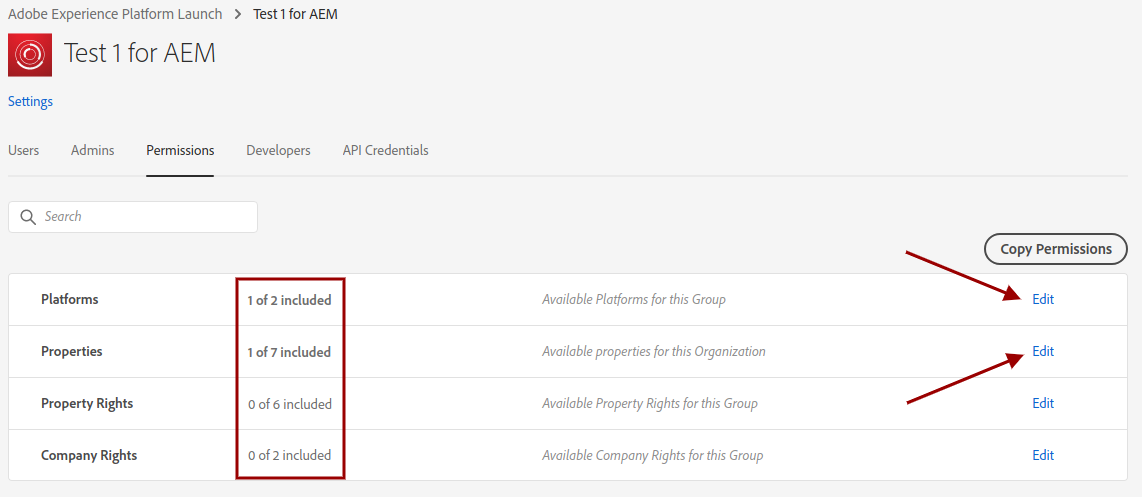
Click on the newly created profile and select “Permissions”.
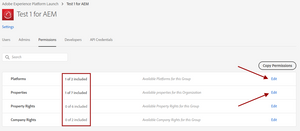
- Click on “Edit” in the “Platform” row and remove all platforms except for “Web”.
- Click on “Edit” in the “Properties row, disable “Auto include” and add only the web property/ies that need to be inserted in AEM websites.
- You do not need any “Property Rights” and “Company Rights”

[UPDATE] If you do not have sysadmin permissions, you will need to request the sysadmin to grant you developer permissions and add you to the developers of this product profile. Let me know in the comments if you have issues. Thanks JB for your note!
Connect AEM to Adobe IO
The next step is to create the connection between AEM and Adobe IO. Remember that AEM runs as a stand-alone application and you need to first connect it to your Adobe organisation. In this process, you will need to work in parallel with the two tools in this section. I, therefore, recommend that you keep two browser windows/tabs open, one for each.
This integration needs a public/private key pair. Before proceeding, you should check the security policies of your company, to see whether it is acceptable to let AEM generate this key pair or it needs to be generated following a more strict procedure. In this latter case, I will assume that you have already created this certificate, uploaded it to your AEM instance and configured AEM to recognise it.
-
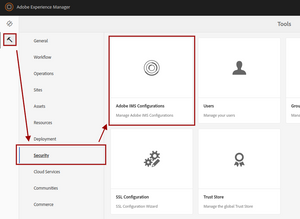
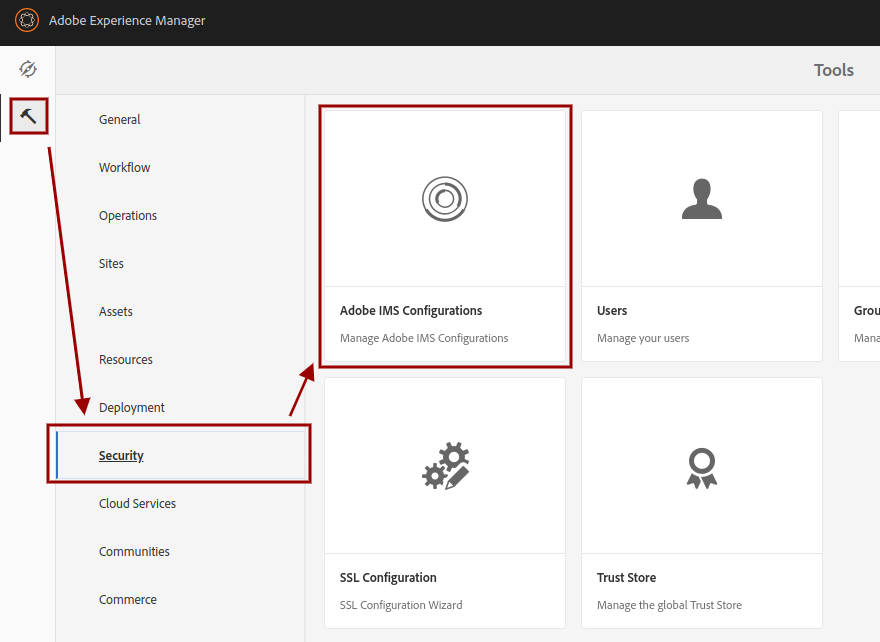
In AEM, go to “Adobe IMS Configurations”
-
Click on “Create”.
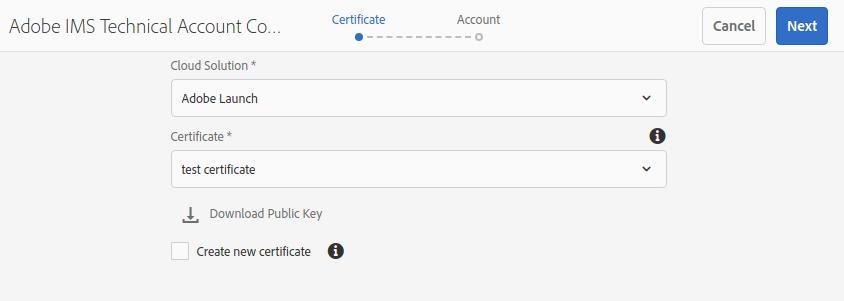
- On the next screen:

- Select “Adobe Launch” as “Cloud Solution” (quite obvious).
- Under “Certificate”:
- If you have configured it beforehand, select it. Keep handy the public key for this certificate.
- Otherwise, enable the checkbox “Create new certificate”, give it an alias, click on “Create certificate” and click on “OK” in the info overlay. You will also need to download the public key.
-
Leave the AEM wizard unfinished and go to the Adobe Developer Console, also known as Adobe IO. Again, check that the Adobe organisation is correct.
-
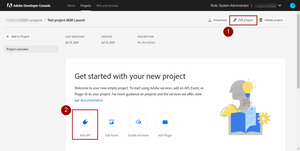
Click on “Create a new project”.
-
Click on “Edit project” to give it a better name and, when done, click on “Add API”.
-
Search and select “Experience Platform Launch API” and click on “Next”.
-
Since we have already generated the certificates, select “Upload your public key” and upload the public key from step 3.b. Click “Next” and “Next” again.
-
Select the product profile you have created in the Admin Console earlier. With this, you are creating a technical user, which will have the permissions described in this product profile.
-
Click on “Save configured API”.
-
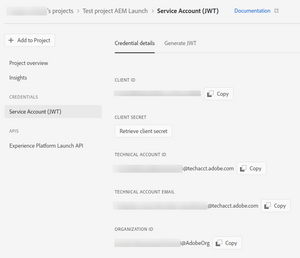
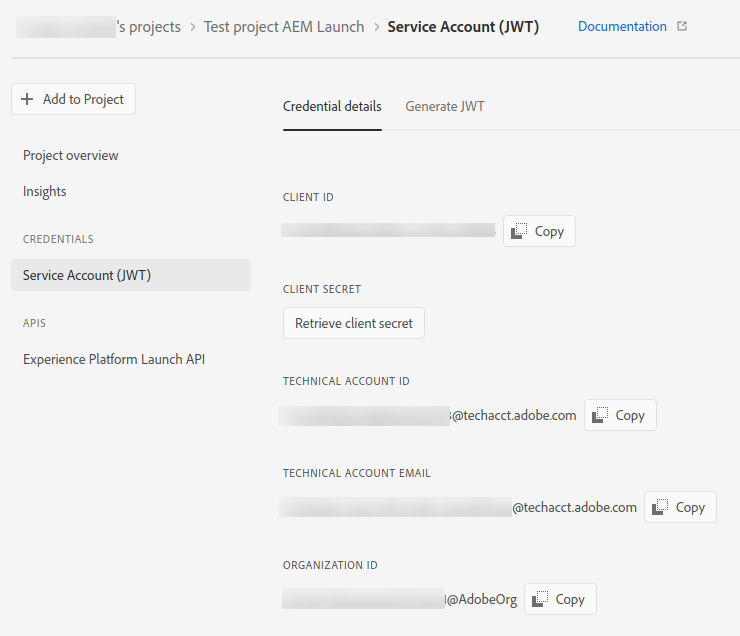
Click on “Service account (JWT)” under “Credentials”. You will see the “Credential details” for this account.
- Go back to the AEM tab and click on “Next”. Be prepared to switch between the AEM and Adobe IO tab/windows.
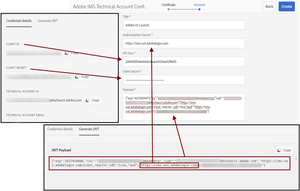
- Title. Give it a meaningful name.
- Authorization Server. Skip it for now.
- API Key. Copy and paste the value of “Client ID” from the Adobe IO tab.
- Client Secret. In Adobe IO, click on “Retrieve client secret” and copy and paste it in AEM.
- Payload. In Adobe IO, click on “Generate JWT” and copy and paste the whole JWT Payload.
- Authorization Server. In the payload above, you will see 2 URLs with the same domain. Copy one of these URLs, paste it and remove the whole path. At the moment of writing, I believe there is only one value:
https://ims-na1.adobelogin.com.
-
Click on “Create”.
- Optionally, if you want to check that the configuration is working, select it and click on “Check Health”. You should get a positive message.


You have finally connected AEM with your Adobe Organisation, with some credentials that have specific permissions.
Configure AEM Site
We can now stay in AEM for the rest of the configuration. Now is when all the steps we have taken so far make sense.
-
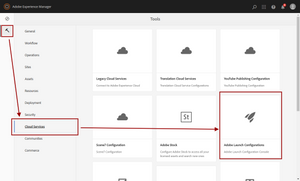
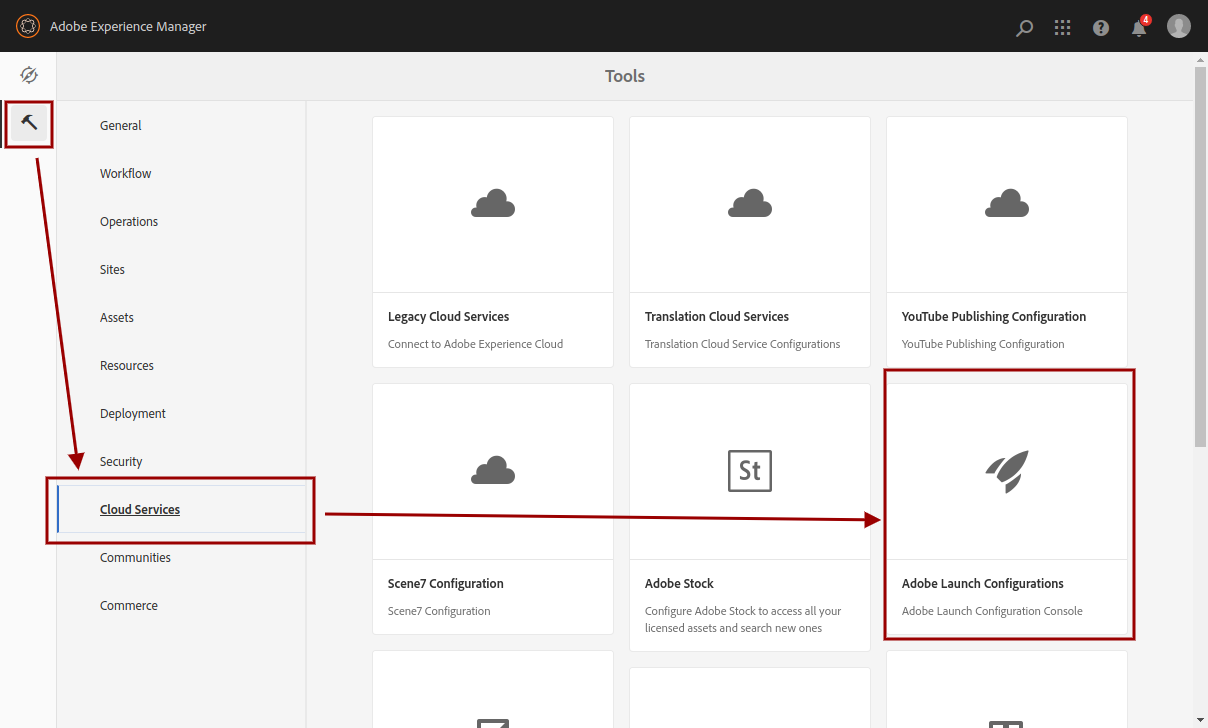
Go to the “Adobe Launch Configuration”
-
Select the site where you want to add the Launch property configured at the beginning of this tutorial. Do not select by clicking on the folder icon, but on the name.
-
Click on “Create”.
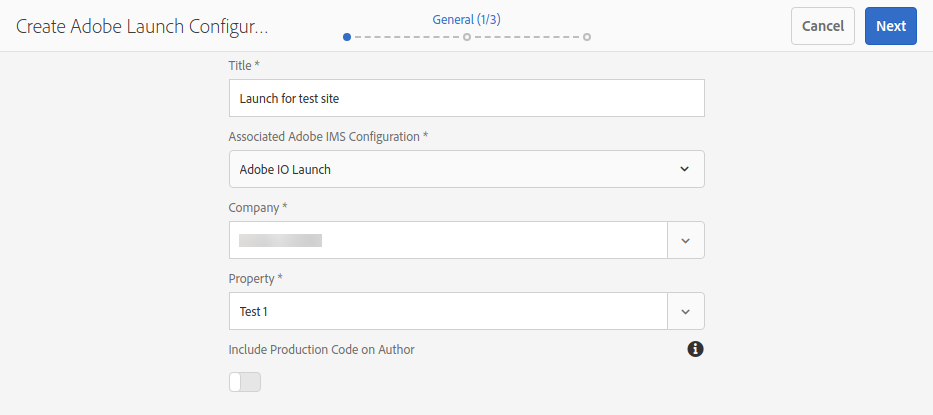
- Configure the Launch web property.
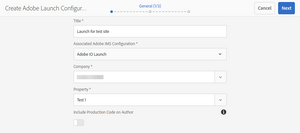
- Title. Give it a meaningful name.
- Associated Adobe IMS Configuration. Select the configuration you have enabled just before.
- Company. From the dropdown, select your Adobe organisation, although you will probably get only one option.
- Property. Select the one you are interested in. It will be one of those you have configured in the product profile.
- Include Production Code on Author. I always leave it disabled.
-
Click on “Next”.
-
Select the staging configuration options. This is what you will get in AEM author when viewing the website as in production. a. Archive. You will probably not be able to change this. I am not going to explain this feature, as it is not trivial. b. Load Library Asynchronously. Depends on your final Launch implementation. c. Library URI. Do not change it.
-
Click on “Next” and do the same for production (i.e. AEM Publish).
- Click on “Create”.
Finally, after this convoluted process, you have Launch on your website. Check the generated code in AEM Publish and you should see the Launch script in the <head> of your HTML code.
Photo by Bianca Ackermann on Unsplash