
Multi-tenancy in Adobe Target
20 Jan 2019 » MSA
After a few weeks delay, I am resuming the multi-tenancy in the Adobe Experience Cloud series of posts. I had an issue with my internal sandbox, which prevented me from showing how to set up multi-tenancy in Adobe Target. I got it fixed this week and I am ready to show it to you. Let’s start!
Properties
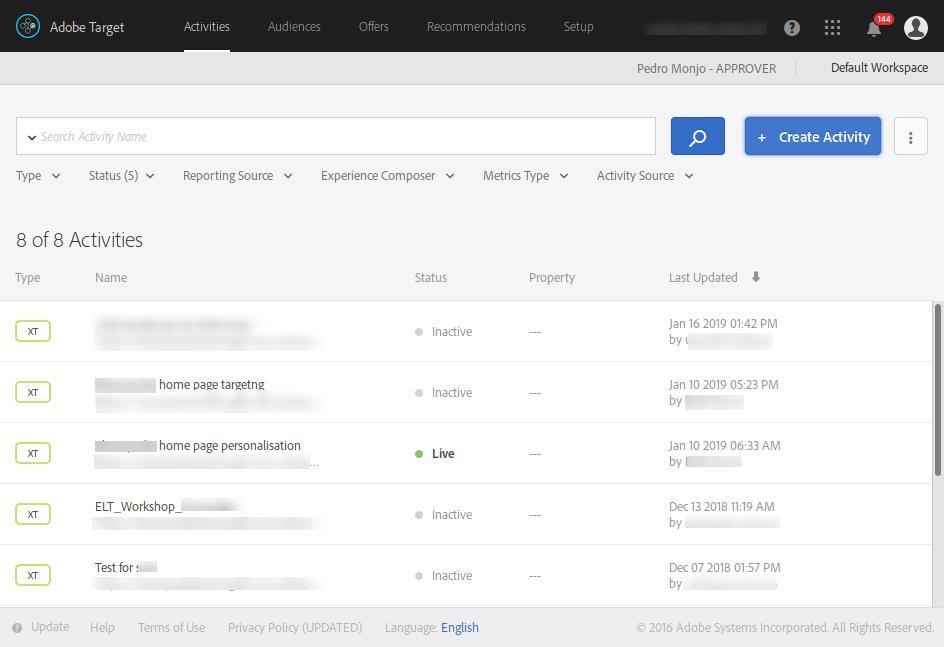
The first thing you need to understand is the concept of properties. In Adobe Target, all activities are created equal. Unlike Analytics (where report suites are isolated) or Audience Manager (where traits and segments are assigned to data sources), there is no separation in Target activities. You can clearly see this when you view the list of activities:
What Adobe Target offers is to group activities logically into properties. The idea behind this concept is that you, as an admin, will limit which activities a user can access. You can then have multiple websites, with multiple properties and each user should only see activities of websites he/she is entitled to.
You can manage the properties from the “Setup” menu:
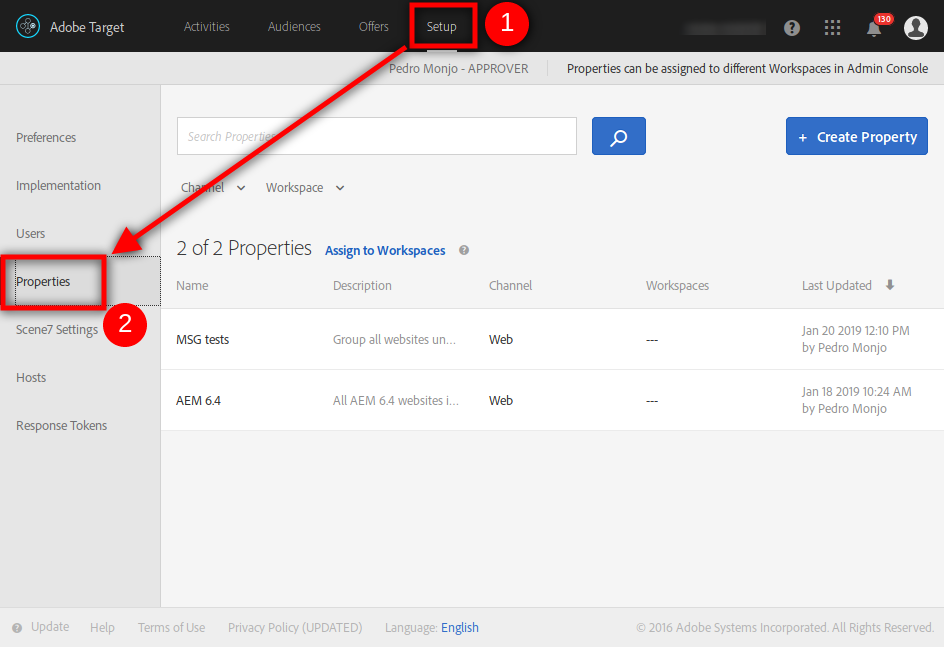
Remember that you need to be an approver to get here.
When creating a new property, after setting the name and the description, you have to click on the”Generate code” button to proceed.
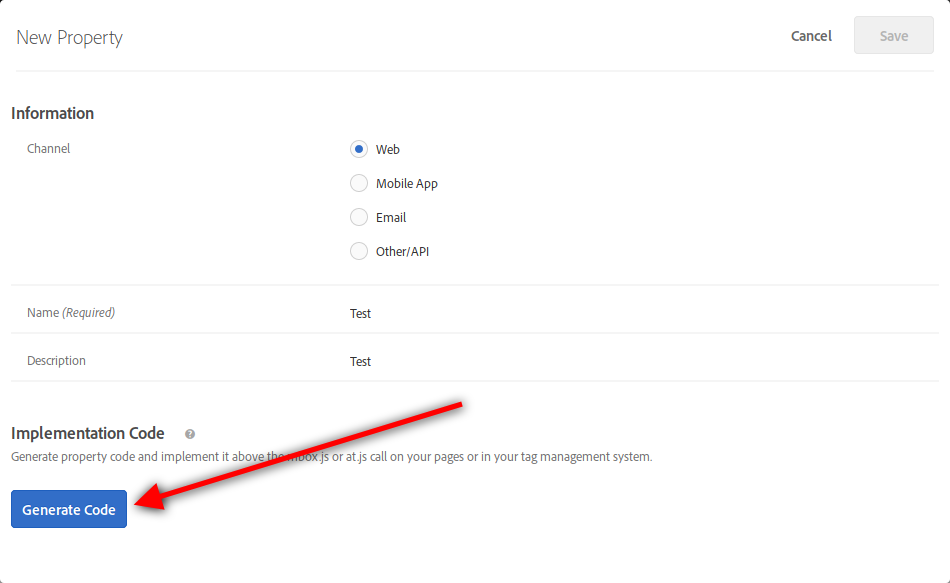
Make a copy of this code somewhere before you save. If you have already created the property and you need to get the code again, you can always get it again by hovering over the property and clicking on the </> button.
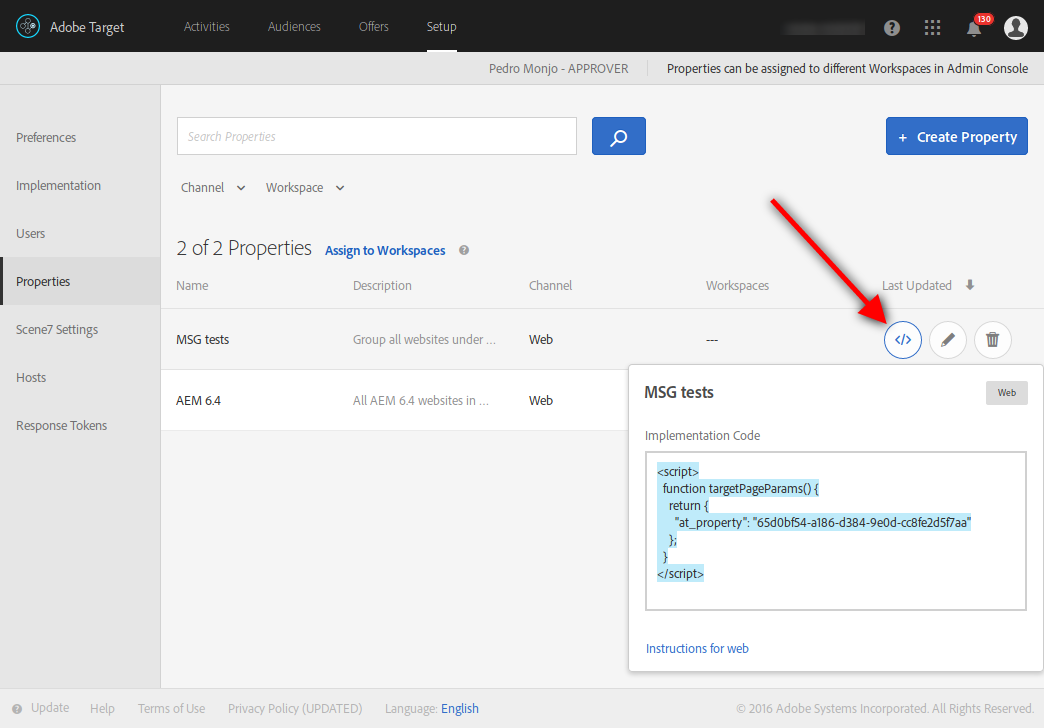
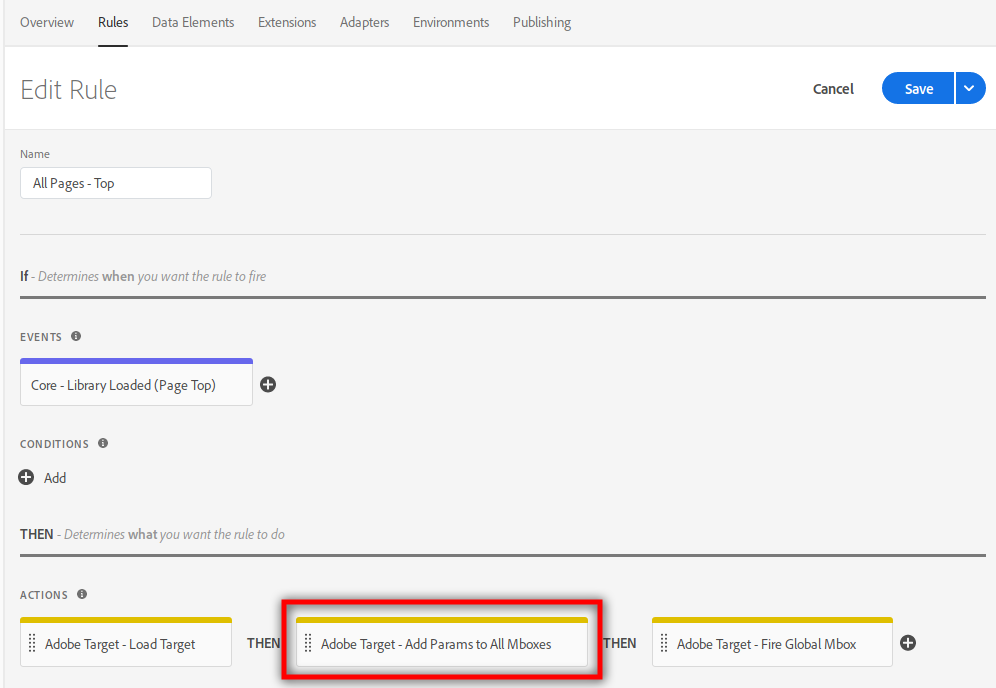
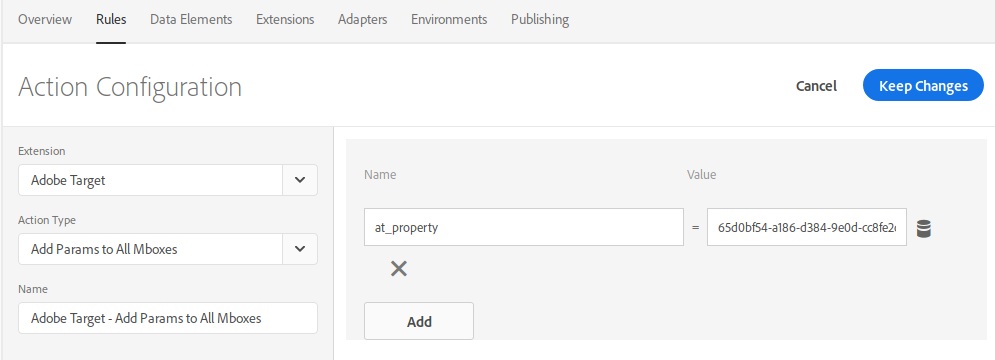
If you are not using a tag manager, you need to put this snippet before your Target code (usually, the at.js file). However, if you are using a tag manager that integrates well with Adobe Target, all you need is to add a global mbox parameter at_property, with the value provided. For example, in Adobe Launch, you can do something like:
Workspaces
The next part of this process takes place in the Admin Console, where you link a product profile to one or multiple properties. This is what Adobe Target calls workspaces. By default, there is always a default workspace, which is assigned to all Target activities. In your multi-tenancy approach, nobody should use this default worspace.
To create a new workspace, you start by creating a new product profile in Target:
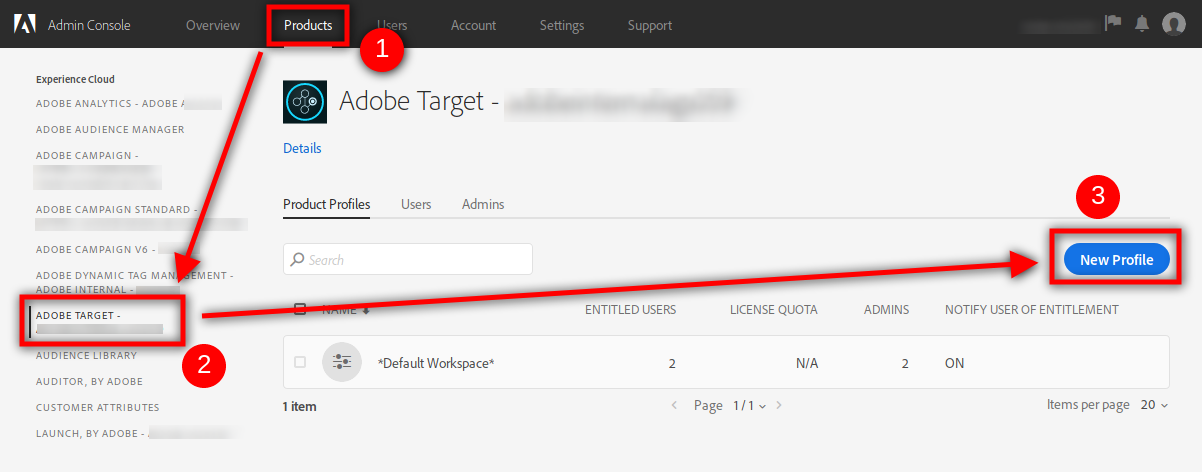
You just give it a name and save it by clicking “Done”. This takes you back to the list of product profiles. Click on the newly created profile and, then, on the “Permissions” tab.
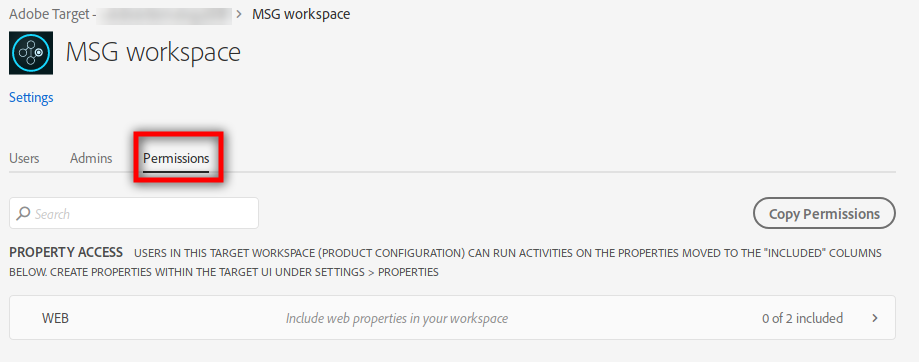
Next, click on the “WEB” bar, which takes you to an interface to choose the properties for this product profile. Click on the “+” icon on all the properties you want to add to this workspace.
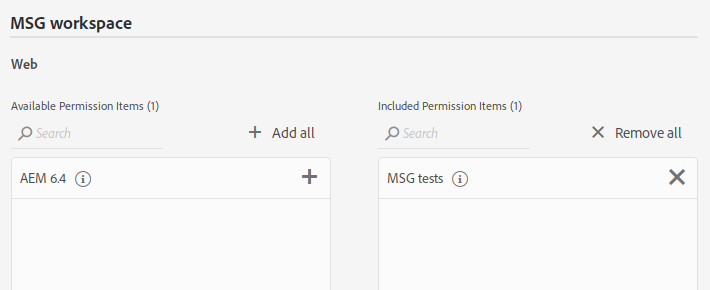
Click on “Save” at the bottom. Repeat for all the workspaces you want to create. Remember that you can add multiple properties into a single workspace.
Finally, add users to workspaces, according to your plan for multi-tenancy. Remember not to add anybody to the default workspace, unless you know what you are doing. If you want to test this feature, you need to add yourself to all workspaces you want to test.
Activities
The last piece of this puzzle is again in Adobe Target. I suggest you log out and in again into the Adobe Experience Cloud, to make sure your user picks up the changes you have just made in the Admin Console. When you go to Target, you will notice that the workspace selection has changed. If you have more than one, you can choose between them:
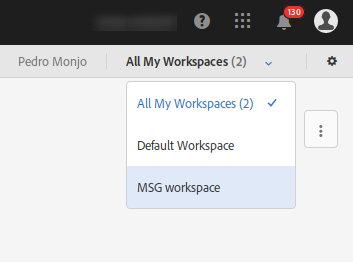
This is my test account and I have kept the default workspace. This selection will filter the activities you can see.
Next, as you create new activities, you must select the workspace to which it belongs. To do that, you edit the activity (or create a new) and, on the experiences step, configure it:
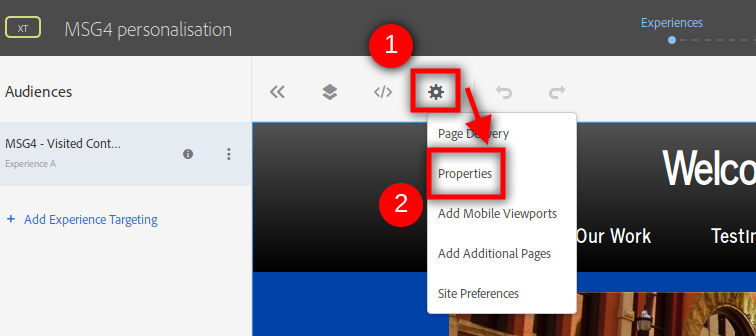
Select the property that you want this activity to be associated with. If you do not select a property, you will get an error message and you will not be able to activate the activity. Obviously, you can only select a property you have been assigned to, through the admin console.
And this step finally closes the loop. Following these steps allows you to have multiple users using the same Target instance, but also avoid interference between groups of them. In other words, you have achieved multi-tenancy in Target.
Header image: Libreshot