
Hybrid Target - Part 2
30 Jun 2019 » Server Side
With the Adobe Target server-side code code already step up, as I explained in part 1, we are now ready to move to the Adobe Target interface and configure it. I will show how to do it with an Experience Targeting activity, but it should work as well with an A/B test.
Create the activity
The first obvious step is to start creating the activity:
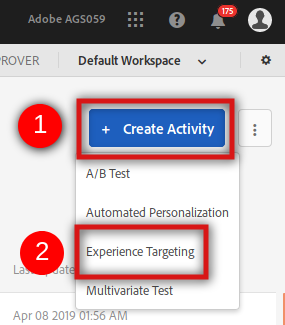
Now is when the “fun” starts. If you have been using Target, you would leave the default selection of Web. Now, even if the end result will show up in the web, we are accessing Target through an API, so you must select this option, together with the appropriate workspace and property:

So far, so good. The next step may come to a surprise to some of you. If you were expecting the Visual Experience Composer, remember that we are using the API. There is no way to use it in this case. You now need to configure the activities manually.
Configuration of the default experience
Set the activity title as usual.
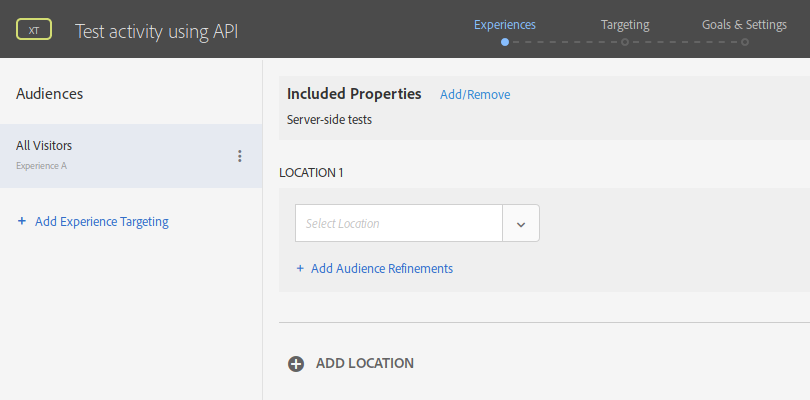
In “LOCATION 1” you have to insert the mbox name. If you remember, in part 1, I used “my-mbox-name” as example. This is the exact name that you need to put here and it is the link between your server-side code and the Adobe Target configuration. When debugging, if your activity does not show up, one of the first points to check is precisely this: make sure that the mbox name is the same in the Target UI and in your code.
Once you have added the mbox name, the content part will show up. I will consider that this is your default activity, so “Default Content” is just right. In this case, when invoking the API, the response will contain no content key/value in the mboxResponses section, so your code needs to take this into account. Depending on your case, you should either have some default content or leave empty.
If your experience requires multiple mboxes (i.e. there are multiple areas on the page you want to manipulate), click on “+ ADD LOCATION” and repeat the same process as above. All experiences within one activity must have the same locations or mboxes. Then, when invoking the API, you should add all mboxes in the same call.
Create a new experience
Obviously, the whole idea of the XT activity is to have alternative experiences for selected visitors. Therefore, the next step is to click on “+ Add Experience Targeting” on the left. The process is the same as with the VEC. You first need to select the audience that should receive this new experience. It is beyond the scope of this post to explain how to create audiences in Target. The process should be the same as with web experiences. As I mentioned in my first post about server-side Target, it is important to include the IP address and the User-Agent in the API calls, so that the geolocation and browser segments can be used.
You will notice that the “LOCATION 1” has been populated for you. Now you need to select a different content. By clicking on the drop-down button on the right, next to “Default Content”, you get all the content options:

From this long list, I recommend that you stick to one of the following two options:
- HTML offer. Either you create it ad-hoc in the experience or use one from your offers library. You can use this option for XML too.
- JSON offer. Same as with HTML, but using JSON content.
I am not sure any of the other options can be used or even make sense in server-side Target. da
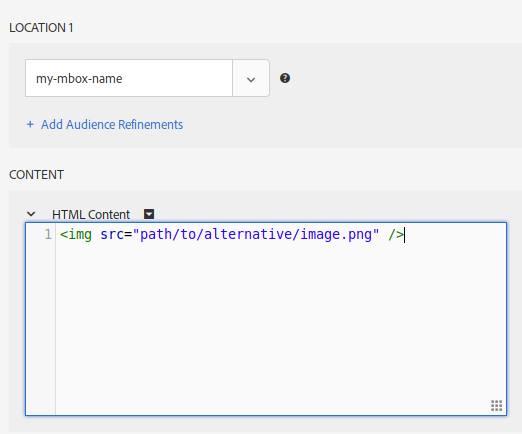
If you choose, for example, “Create HTML Offer”, you will get a text box to input the HTML that you want to show instead of the default content:
Repeat this whole process for each audience in the activity.
HTML vs JSON offers
Before you start even coding, you have to decide whether you will use one or the other format. Remember that one of the input parameters of the API is contentAsJson. You have to set it to true if you are using JSON offers; otherwise, set it to false. I do not recommend that you mix both types of offers in your implementation, as it just makes it more complicated and more error prone.
What is the difference between them?
-
HTML offers. Since the content is in the format that the browser will understand, when requesting an mbox content, you do not need to process the response. Whatever comes from Target can replace or be inserted in the HTML you are creating in your server code. In the first page of the first visit, you can also use it with
adobe.target.getOffer()andadobe.target.applyOffer()directly, with no manipulations. I would generally recommend this option. - JSON offers. In this case, you need to manipulate the response and modify the HTML with the instructions in the JSON object. This makes this option more complex to use, but it also adds more flexibility. For example, you may want to create a framework to modify the page in more sophisticated ways than what HTML offers allow. Remember to also cate for the first page of the first visit, where you will need to generate client-side JavaScript code to manipulate the JSON object in the same way as the server-side code.
- XML offers. I am adding this format, just in case you want to use it. It is a combination of the previous 2: you should use an HTML offer for it, but treat it as the JSON case, as you will have to manipulate it before sending it to or using it in the browser.
Finalising the Target activity
Once you have created all the experiences you need, you should continue configuring the activity as with any other Target activity. It is beyond the scope of this post to document this process and I assume you are familiar with it. There are no differences between client-side and server-side implementations. If you are wondering about A4T, I will explain it in a later post. Finally, remember to activate the activity.
Let me know in the comments if there are any areas that are not clear and you would like some additional explanations.
Photo from pxfuel